Strawberry Rhubarb Hand Pies

Strawberry Rhubarb Hand Pies | Image: Laura Messersmith

Strawberry Rhubarb Hand Pies | Image: Laura Messersmith

It should come as no surprise that I’m pretty obsessed with pie – both the making of pie (and all the adventures that ensue) and of course the eating of pie (the best part.) As peak summer produce season draws closer and closer I’ve been dog-earring my copy of Four and Twenty Blackbird’s and plotting my next pie adventure like a cartoon villain. Not a terribly villainous villain, unless bringing dessert wherever I go in the name of “sharing” is considered wicked. I tried the sisters Elsen’s pie crust recipe this time around – the use of cider vinegar was intriguing – and since I’ve always been a fan of all-butter pie crusts this one is my new go-to.

The filling recipe by Chef Hugh Acheson, my favorite Top Chef guest judge, combines strawberry and rhubarb with just a hint of spice from the black pepper. Strawberry and rhubarb come into season around the same time and are a classic example of “what grows together goes together.” A perfect blend of sweet and tangy all in a portable, buttery package. These hand pies are made to be shared; preferably while picnicking on a sunny day in the park.

Strawberry Rhubarb Hand Pies | Image: Laura Messersmith

Strawberry Rhubarb Hand Pies | Image: Laura Messersmith

Strawberry Rhubarb Hand Pies (yield 16 pies)

All-Butter Crust Ingredients:
2 1/2 cups unbleached all-purpose flour
1 teaspoon kosher salt
1 tablespoon granulated sugar
1/2 pound (2 sticks) cold unsalted butter, cut into 1/2-inch pieces
1 cup cold water
1/4 cup cider vinegar
1 cup ice cubes

Crust Instructions:
Mix the flour, salt, and sugar together in a large bowl. Add the diced butter pieces and toss lightly to coat with the flour mixture. With a pastry blender, cut the butter into the flour mixture, working quickly until mostly pea-size pieces of butter remain. Take care not to over blend.

In a large measuring cup, combine the water, cider vinegar, and ice. Sprinkle 2 tablespoons of the ice water mixture over the butter and flour, and blend with a rubber spatula until it is fully incorporated.

Continue adding more of the ice water mixture, 1 to 2 tablespoons at a time, using the spatula or your hands (or both) to mix until the dough just comes together in a ball, with some dry bits remaining.

Squeeze and pinch with your fingertips to bring all the dough together, sprinkling dry bits with more small drops of the ice water mixture, if necessary, to combine. Discard any remaining ice water mixture.

Shape the dough into a flat disc, wrap in plastic, and refrigerate for at least 1 hour, preferably overnight, to give the flour time to absorb the moisture and relax. Wrapped tightly, the dough can be refrigerated for 3 days or frozen for 1 month.

Filling Ingredients:
1 tablespoon unsalted butter
7 ounces strawberries, hulled and roughly chopped
5 ounces rhubarb, peeled and roughly chopped
3 tablespoons sugar
1⁄2 tablespoon white wine vinegar
1⁄4 teaspoon freshly ground black pepper
1⁄4 teaspoon lemon juice
1 pinch kosher salt
1 egg
2 tablespoons sugar in the raw

Filling Instructions:
In a medium saucepan, melt the butter over medium heat. Add the strawberries and rhubarb and cook until soft and jam-like, 6–8 minutes. Stir in sugar, vinegar, pepper, lemon juice, and salt; cook 3 minutes more until the mixture thickens. Cool to room temperature, then cover and chill at least 30 minutes before using.

Assemble and bake the pies: On a lightly floured surface, roll dough 1⁄4 inch thick and use a large, round biscuit cutter to cut out 14 rounds. Gather the scraps and re-roll to create the final 2 rounds.

Lay the disks of dough out on parchment paper-lined baking sheets. Place 2 tablespoons filling in center of each disk of dough. Whisk the egg in a bowl, brush edges of the dough with the egg wash and fold in half over the filling. Press the edges together and crimp with a fork to seal. Chill 20 minutes.

Heat oven to 400 degrees F. Using a fork, prick tops of pies; brush tops with the remaining beaten egg and sprinkle with coarse sugar. Bake pies until golden, about 20 minutes; let cool slightly before serving.

Re-written and very lightly adapted from All Butter Pie Crust by Four and Twenty Blackbirds (pg. 207) and Strawberry Rhubarb Hand Pies by Chef Hugh Acheson via Saveur.

Strawberry Rhubarb Hand Pies | Image: Laura Messersmith

Strawberry Rhubarb Hand Pies | Image: Laura Messersmith

Small Kitchen Friendly?
Surprisingly, yes! I used a large mixing bowl, 2 quart sauce pan, 2 rimmed baking sheets, pastry cutter, rubber spatula, rolling pin, 4 inch fluted biscuit cutter, 2 tablespoon cookie scoop, pastry brush, dry and liquid measuring cups and spoons, and parchment paper.

Strawberry Rhubarb Hand Pies | Image: Laura Messersmith

Strawberry Rhubarb Hand Pies | Image: Laura Messersmith

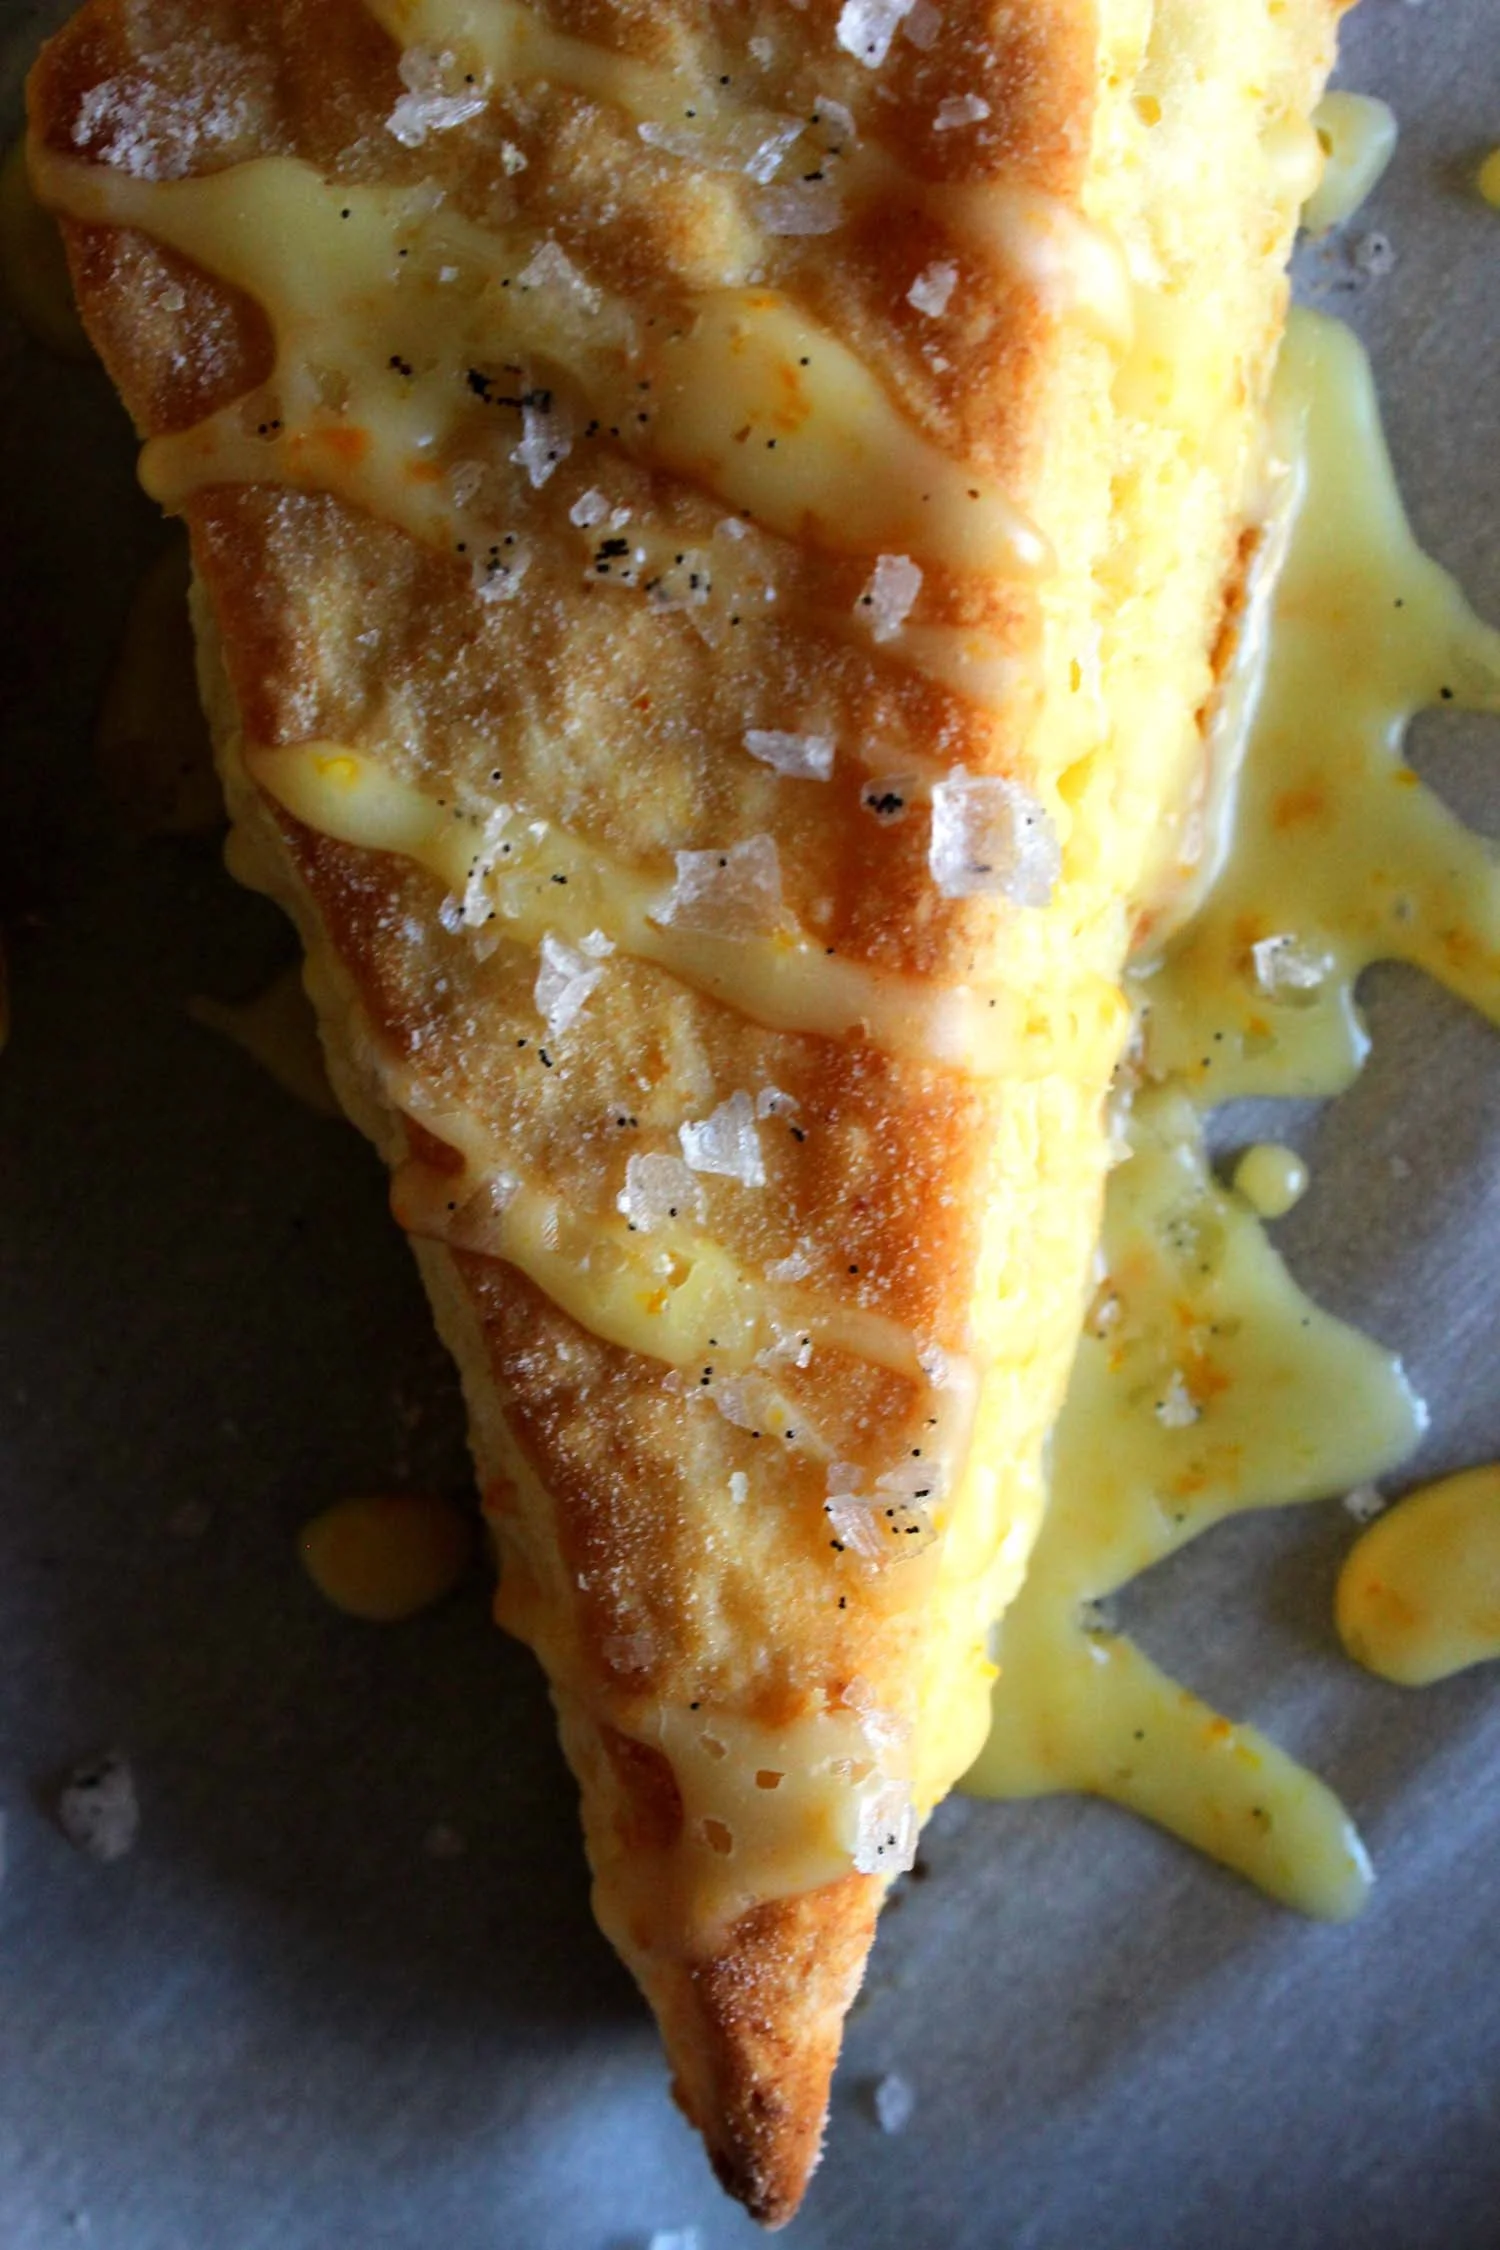
Orange Ricotta Scones with Vanilla Sea Salt

Orange Ricotta Scones with Vanilla Sea Salt | Image: Laura Messersmith

Orange Ricotta Scones with Vanilla Sea Salt | Image: Laura Messersmith

Winter has fully settled on New York and frankly it’s been a shock to my system. I’d love to go into hibernation mode and stay under the covers emerging only for BBC crime dramas on Netflix (we finished The Fall with Gillian Anderson and now I’ve moved on to Broadchurch. Slow build as we discover that many people in the small Dorset town have secrets!) and carb-based meals. Or Chipotle.

The next warmest option is to turn on the oven – a welcome blast of heat for my cold fingers – and bake something simple, comforting, and citrus based. For me that’s a batch of scones. They take enough effort so feel like I’m accomplishing something, but are so unfussy and rustic in presentation that they’re on the table in less than an hour.

I originally planned to re-create a wonderful lemon-ginger biscuit I had at the Ferry Terminal in San Francisco from Biscuit Bender (amazing with blueberry jam), but got side tracked thinking about other citrus + ginger combinations. I also realized I had a container of whole-milk ricotta in the fridge left over from another recipe and once I remembered the vanilla salt I made last month the wheels totally fell off that biscuit train.

Not to worry though, because these Orange Ricotta Scones totally deliver and because the biscuit train is never off the rails long around here.

Orange Ricotta Scones with Vanilla Sea Salt | Image: Laura Messersmith

Orange Ricotta Scones with Vanilla Sea Salt | Image: Laura Messersmith

Orange Ricotta Scones with Vanilla Salt (Yield: 12-16 Scones)

Ingredients:
2 1/2 cups all purpose flour
3 tablespoons granulated sugar
1 tablespoon baking powder
1/4 teaspoon salt
6 tablespoons cold butter, diced
1 large egg
3/4 cup whole milk ricotta, bought or homemade
1/4 cup whole milk
2 tablespoons orange zest, divided about 2 large oranges
1 1/4 cups confectioners sugar
2 teaspoons orange blossom honey
4-5 teaspoons orange juice
Vanilla Sea Salt (recipe here)

Instructions:
Preheat oven to 400 degrees F. Chill the baking sheets and ingredients in between steps.

In a large bowl combine the all purpose flour, granulated sugar, baking powder, and salt. Lightly toss the diced butter in the flour mixture to coat then using a pastry cutter, blend in the butter until the mixture resembles coarse crumbs. Set aside in the refrigerator.

In a large liquid measuring cup, combine 1 1/2 tablespoons of the orange zest with the egg, ricotta, and whole milk. Make a well in center of the flour mixture and add the ricotta mixture all at once, fork the wet and dry ingredients together until just combined. The dough will be a little shaggy at this point.

Turn the dough out onto a lightly floured surface. Gently fold the dough 8 to 10 times until dough pulls together. Pat into a rectangle about 1 inch thick and cut into squares or triangles.

Place the scones 2 inches apart on a parchment paper-lined baking sheet. Bake about 12-14 minutes or until lightly golden brown. Slide the parchment and scones onto a cooling rack.

While the scones are cooling, whisk together the confectioner’s sugar, honey, reserved orange zest and orange juice with a pinch of salt until smooth. Drizzle the icing over the cooled scones, sprinkle with a little vanilla sea salt, and serve!

Written with reference to Food + Wine’s Glazed Lemon Ginger Scones and Better Homes and Garden’s Strawberry Shortcake Scones.

Orange Ricotta Scones with Vanilla Sea Salt | Image: Laura Messersmith

Orange Ricotta Scones with Vanilla Sea Salt | Image: Laura Messersmith

Small Kitchen Friendly?
Yes, totally. I used a large mixing bowl, pastry cutter, 2 cup-size liquid measuring cup, dry measuring cups and spoons, a microplane grater, paring knife, and a dinner fork. I also needed a small bowl, small spoon, two rimmed baking sheets, a bench scraper, and parchment paper.

The Verdict:
These are definitively scones, not biscuits thanks to the ricotta and sugar, but are also just very lightly sweet when un-iced. During my experiments I tasted them plain, with a bit of honey, iced only, and iced + vanilla salt – all were delicious in their own way, so choose what you like best. The ricotta keep the dough tender and its very mild flavor allows the sweet orange come through as the elegant star of the whole affair. Pair with a cup of tea and an Agatha Christie novel.

Orange Ricotta Scones with Vanilla Sea Salt | Image: Laura Messersmith

Orange Ricotta Scones with Vanilla Sea Salt | Image: Laura Messersmith

Butternut Squash & Gruyere Galette

Butternut Squash & Gruyere Galette | Image: Laura Messersmith

Butternut Squash & Gruyere Galette | Image: Laura Messersmith

The snow is still deep in Central Park, but winter seems to be easing its grip on the city; the banks along the street are beginning to recede leaving a trail of gritty treasure behind. Which means (if we’re lucky!) that spring is on its way and it’s time to get as many of the the cold weather recipes I’ve been thinking of out of my system – including this Butternut Squash & Gruyere Galette.

This recipe for a gratin written by Kimberley Hasselbrink was my introduction to the combination of butternut squash, Gruyere and toasted hazelnuts and quickly became a favorite. The rich nutty flavor of the cheese emphasized by the hazelnuts and paired with the deep roasted flavor of the caramelized onions and butternut squash is amazing.

I’ve been focused on improving my pie crust game in 2015 and combining this filling with a whole wheat crust seemed like a match made in heaven. I love the toasty flavor of the whole wheat, and the rustic appearance of a galette (or crostata if you prefer) fits beautifully with this earthy, but elegant dish.

Butternut Squash & Gruyere Galette | Image: Laura Messersmith

Butternut Squash & Gruyere Galette | Image: Laura Messersmith

Butternut Squash & Gruyere Galette (serves: 4-6 people)

Pastry Ingredients:
1 cup whole wheat flour
6 tablespoons cold, unsalted butter
3/4 teaspoon kosher salt
1/3 cup very cold water

Filling Ingredients:
2 pounds butternut squash
1 cup (1 medium) yellow onion
1/4 cup whole hazelnuts (or 1/8 cup chopped)
1/4 pound Gruyere, grated
1 egg, beaten
2 tablespoons unsalted butter
2 tablespoons olive oil
3 teaspoons apple cider vinegar
1 1/2 teaspoons fresh thyme
1 1/2 teaspoons kosher salt
3/4 teaspoon black pepper

Pastry Instructions:
Dice the cold unsalted butter into small cubes and measure the water. Replace both in the refrigerator while you set up and measure the remaining ingredients. In the bowl of a food processor fitted with a steel blade place the whole wheat flour and kosher salt. Pulse a few times to mix.

Add the diced, cold butter to the food processor and toss gently in the flour to coat. Watch your fingers! Replace the cover and pulse about 10-15 times until the butter is the size of peas and evenly distributed in the flour.

Lastly, slowly pour the ice water through the feed tube of the processor while pulsing the blade. As soon as the dough begins to pull together into a crumbly ball, stop pulsing the processor. Turn the pieces of dough out onto a piece of plastic wrap and use the wrap to press into a single flat disc. Refrigerate the dough for at least an hour until it becomes firm.

Filling Instructions:
Pre heat the oven to 325 degrees F.

While the dough chills, peel the butternut squash and cut in half lengthwise. Scoop out the seeds and discard (or keep if you want to toast them!) Slice both halves into semi-circles about 1/3 inch wide.

Place the butternut squash pieces on a baking sheet lined with parchment paper and toss with the olive oil, apple cider vinegar, kosher salt and black pepper. Make sure the pieces are evenly coated and have space on the baking sheet. Bake for 20 minutes at 325 degrees F turning the pieces over halfway through.

Peel and slice the onions into thin rings or half-moons. Melt 2 tablespoons of butter in a medium sauté pan over very low heat and cook the onions for 20-25 minutes until they soften and caramelize, stirring occasionally.

Toast the whole hazelnuts for 3-5 minutes in a small dry sauté pan. Keep a close watch on the nuts; shimmy the pan periodically to turn and prevent them from burning. Allow to cool and then very roughly chop to your taste. Grate or chop the gruyere.

Turn the oven up to 400 degrees F.

To assemble, roll the chilled dough out on a lightly floured surface to about 1/4 inch thick and 7-8 inches in diameter. Place the dough on a parchment paper lined baking sheet and layer the gruyere, roasted butternut squash, caramelized onions, toasted hazelnuts in the middle leaving a 1 – 1 ½ inch border. Sprinkle the layers with the fresh thyme leaves.

Fold a section of the dough border up to partially cover the filling and overlapping the extra to form pleats. Press the folds gently together and brush with the beaten egg.

Bake at 400 degrees F for 30-40 minutes, rotating the baking sheet halfway through the cooking time, until the crust is golden and the butternut squash is tender.

Allow to cool for a few minutes before serving.

Inspired by and partially adapted from Butternut Squash Gratin by Kimberley Hasselbrink for Etsy.

Butternut Squash & Gruyere Galette | Image: Laura Messersmith

Butternut Squash & Gruyere Galette | Image: Laura Messersmith

Small Kitchen Friendly?
Yes, with a little organization. For the pastry I used a 6 cup food processor (a large bowl and a pastry cutter, or even two butter knives will work too), a rolling pin, and measuring cups and spoons. For the filling and to finish the galette I used a large cutting board, chef’s knife, medium sauté pan, two baking sheets, a vegetable peeler, and wooden spatula. Parchment paper is also super helpful with clean up, or if you want to re-use a baking sheet.

The Verdict:
I’d like to pretend that I sat down very genteelly and had a piece of Butternut Squash & Gruyere Galette with a beautiful salad and a glass of sauvignon blanc like a grown-up. But really midway through taking the photos for this post I couldn’t resist the warm toasty whole wheat pastry wrapped around the mellow squash and caramelized onions. So, there I was standing over the table with a wedge of galette in one hand and the camera in the other. If you were here when it came out of the oven you wouldn’t blame me – I hope! This reheats in the oven nicely, so if there happen to be leftovers you’ll still be able to enjoy them the next day.

Butternut Squash & Gruyere Galette | Image: Laura Messersmith

Butternut Squash & Gruyere Galette | Image: Laura Messersmith

Pear Cranberry Crostata

Pear Cranberry Crostata | Image: Laura Messersmith

Pear Cranberry Crostata | Image: Laura Messersmith

Each week I follow along with Ina Garten (aka the Barefoot Contessa) and attempt to recreate one of her dishes in my tiny New York City kitchen. The catch? This is my version of cooking school and I’m making these recipes for the first time. I’ll share both my successes and um, challenges, along the way and we’ll see if I can keep up with the Contessa!

Episode: “Training Day Dinner”

The Set-up: Ina and Chef Joe Realmuto have offered to help make dinner for the East Hampton volunteer firefighters.

The Menu: Grilled Bread with Prosciutto, TownLine BBQ Pork Ribs, Sandy’s Potato Salad, Pear and Cranberry Crostata

0:42 – Ina is starting us off with Pear and Cranberry Crostata which she chose because it’s served room temperature, can be easily transported and is “absolutely delicious.” Good call on all three.

1:36 – I kind of assumed that crostata was basically a flatter version of a pie, but I notice that Ina isn’t putting any spices in with the diced pears, just a little orange zest.

2:05 – Pastry time, this recipe is a little different than the one she recommended for pie – it’s butter only, no vegetable shortening – and seems a bit softer.

3:28 – A quick intro to the East Hampton Volunteer Fire Department (est. 1975), so we know why this dinner is so important.

4:41 – Back with Ina to make the topping for the crostata – cinnamon, butter, allspice, sugar – and I ask myself, “How bad could that be?”

5:52 – These look seriously delicious and I can tell already that this is the recipe I want to make.

6:39 – I’m watching Ina intently as she finishes the final assembly – especially the crust folding technique – I think this maybe where the magic happens.

7:57 – Of course she makes it look so simple, but there must be a trick, right? I’m noticing no egg wash either which seems standard for getting golden brown pastry…

10:14 – Ina has rolled up to the EHVFD in an emergency vehicle of her own – emergency dessert.

11:23 – We get a little overview of the preparations underway, buffet tables, grill assembly, and Ina’s partner in crime: Chef Joe Realmuto.

12:45 – Ina heads upstairs to cook with Sandy, mastermind of Sandy’s Potato Salad, and Ina is put to work chopping hard boiled eggs.

13:16 – Sandy tells Ina that this is an old fashioned Southern recipe from her family tradition and I believe it – any mayonnaise based salad that also calls for pickle relish has got to be straight off the picnic table.

14:35 – Ina and Sandy have a heart to heart about how cooking is only kind of a science, since even the same ingredients vary in flavor. True story, sometimes you do everything the same and it just turns out differently!

15:28 – Taste test time and Ina approves of this “really old fashioned potato salad.”

20:34 – We’re outside at the giant grills set up for Chef Realmuto’s ribs which start with a dry rub of paprika, salt, sugar, ground mustard, chili powder, cumin, black pepper, garlic powder, and cayenne. Mike is a huge barbecue aficionado I wonder if he would approve of this recipe?

21:53 – Step Two of the process involves a “Texas mop”, a term I’ve never heard before, and it looks like a miniature version of a rope mop used for floors, except this one is used to baste the ribs every half hour.

22:15 – A little research tells me that “Texas mop” could also be referring to the basting sauce itself.

23:47 – Joe apparently made these ribs in a smoker at his restaurant and is just using the grill to re-heat. I’m relieved to hear that my fellow Yankees haven’t confused “grilling” with “barbecue.”

26:36 – Over to Ina who is making Grilled Bread with Prosciutto as an appetizer while Joe sets up giant platters of ribs.

27:50 – Yum. Ina is used smoked mozzarella on top of the prosciutto – I love smoked cheeses. My stomach is growling.

28:21 – Training is over and the buffet table is laden with all sorts of salads including Sandy’s Potato Salad, of course.

29:32 – The crostata is served and the cooking team celebrates with a round of high-fives!

Pear Cranberry Crostata | Image: Laura Messersmith

Pear Cranberry Crostata | Image: Laura Messersmith

Final Thoughts:
I Googled “crostata” and “galette” - turns out they’re the same thing in different languages (Italian and French.) Cue the “The More You Know” star…

I feel like crostatas might really be my jam. #sorrynotsorry in advance for the influx of crostata recipes I’ll be posting.

I love how involved Ina is with her local community – I swear she’s always volunteering or donating her time.

Lessons Learned:
Dough – I’m trying to reach some level of comfort with pie crust and after my last attempt with Deep Dish Apple Pie where the dough was too dry I was hyperaware of adding enough water. I think I actually overdid it since the result was pretty sticky, but it seemed a little more forgiving once a fair amount of additional flour was incorporated during the rolling out process. I noticed that because the dough was a little soft that my crostata edges were prone to falling down, but I have confidence that one of these days I’ll get it right!

Fruit – The original recipe called for “big chunks” of pear, but the ones I was had were a little under-ripe and since I was making mini versions I cut them a little smaller. This ended up being just perfect – the fruit was definitely cooked, but still firm pieces. I’d love to try this recipe again with fresh cranberries since the dried ones ended up a little dark and I don’t know how much of the flavor came through. I also forgot the orange zest, but it didn’t seem to matter much.

Assembly – I cut this recipe in half and then made three mini crostatas instead of one medium sized one. All the proportions still worked perfectly and as I was finishing the assembly process I decided to brush them with egg wash and sprinkle a little turbinado sugar – all good choices that I’d recommend!

Pear Cranberry Crostata | Image: Laura Messersmith

Pear Cranberry Crostata | Image: Laura Messersmith

Small Kitchen Friendly?
Yes, assuming you have a medium sized food processor. I also used a large cutting board, chef’s knife, vegetable (in this case fruit) peeler, rolling pin, dry & liquid measuring cups, measuring spoons, a baking sheet, and a medium bowl. I needed a small bowl and a pastry brush for the egg wash; plastic wrap and parchment paper rounded out the “kit.”

The Verdict:
I put these mini Pear and Cranberry Crostatas out as a mid-afternoon snack for some friends and when it was time to go there was just one lonely quarter leftover. Shockingly, it took zero convincing to get someone to help out with that last piece. I personally love the sweetness of the pears with the tart cranberries and how the crust gets beautifully crisp; which means these can be eaten “politely” with a fork or just picked right up like a slice of pizza. I also have full leave from Mike to make these anytime. Color me a crostata convert.

Pear Cranberry Crostata | Image: Laura Messersmith

Pear Cranberry Crostata | Image: Laura Messersmith