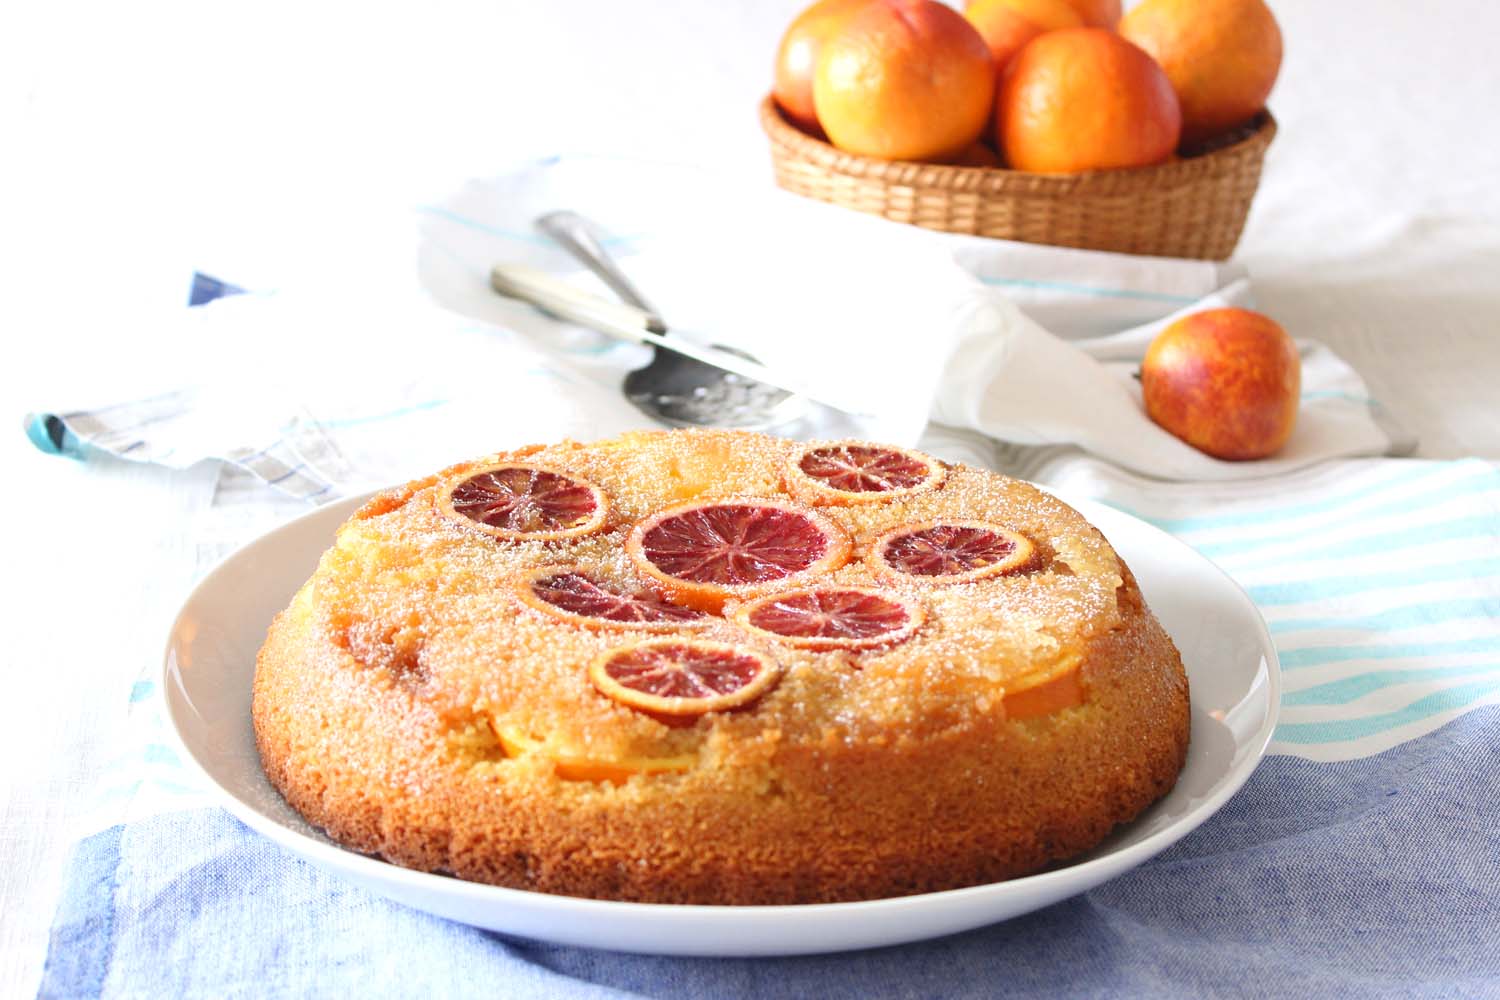
Valencia Orange Pound Cake

Valencia Orange Pound Cake | Image: Laura Messersmith
Each week I follow along with Ina Garten (aka the Barefoot Contessa) and attempt to recreate one of her dishes in my tiny New York City kitchen. The catch? This is my version of cooking school and this week I’m making Orange Pound Cake for the first time. I’ll share both my successes and “challenges” along the way along with suggestions on how to adapt Ina’s recipe to a small kitchen.
Episode: “Jeffrey’s Birthday Pop-up”
The Set-up: It’s Jeffrey’s birthday and Ina is cooking him a surprise Greek themed lunch at an historic home in East Hampton
The Menu: Hummus, Spinach Pie, Raspberry Orange Trifle (featuring: Orange Pound Cake and Orange Cream)
0:42 – Jeffrey doesn’t want a birthday cake and Ina is of the opinion that no one over the age of 25 needs one anyway (did not get this memo) so she’s making individual Raspberry Orange Trifles for dessert.
1:25 – The base of the trifle is homemade Orange Pound Cake, so we’re starting with that step.
2:03 – Pro Tip #1: A light cake starts with butter (and eggs) softened to room temperature – preferably at least over night; this helps the butter cream together with the sugar and combine evenly with the eggs.
3:19 – Pro Tip #2: The second step to light cakes is alternating the dry ingredients with the wet ingredients so that both are incorporated without over mixing.
4:36 – Ina has a ton of good baking recommendations today! Here’s Pro Tip #3: Use a kitchen scale (don’t forget to tare off the weight of the pan) to make sure the batter is evenly distributed.
5:17 – I remember hearing an interview where Ina said that buttering and flouring the insides of cake pans was one of her least favorite kitchen tasks. Word. But why is it so annoying?
6:48 – We get the inside scoop on the rest of Jeffrey’s celebration – the lunch will be at the historic “Home Sweet Home” residence with flowers and period tablesetting by Ina’s friend Lilee Fell
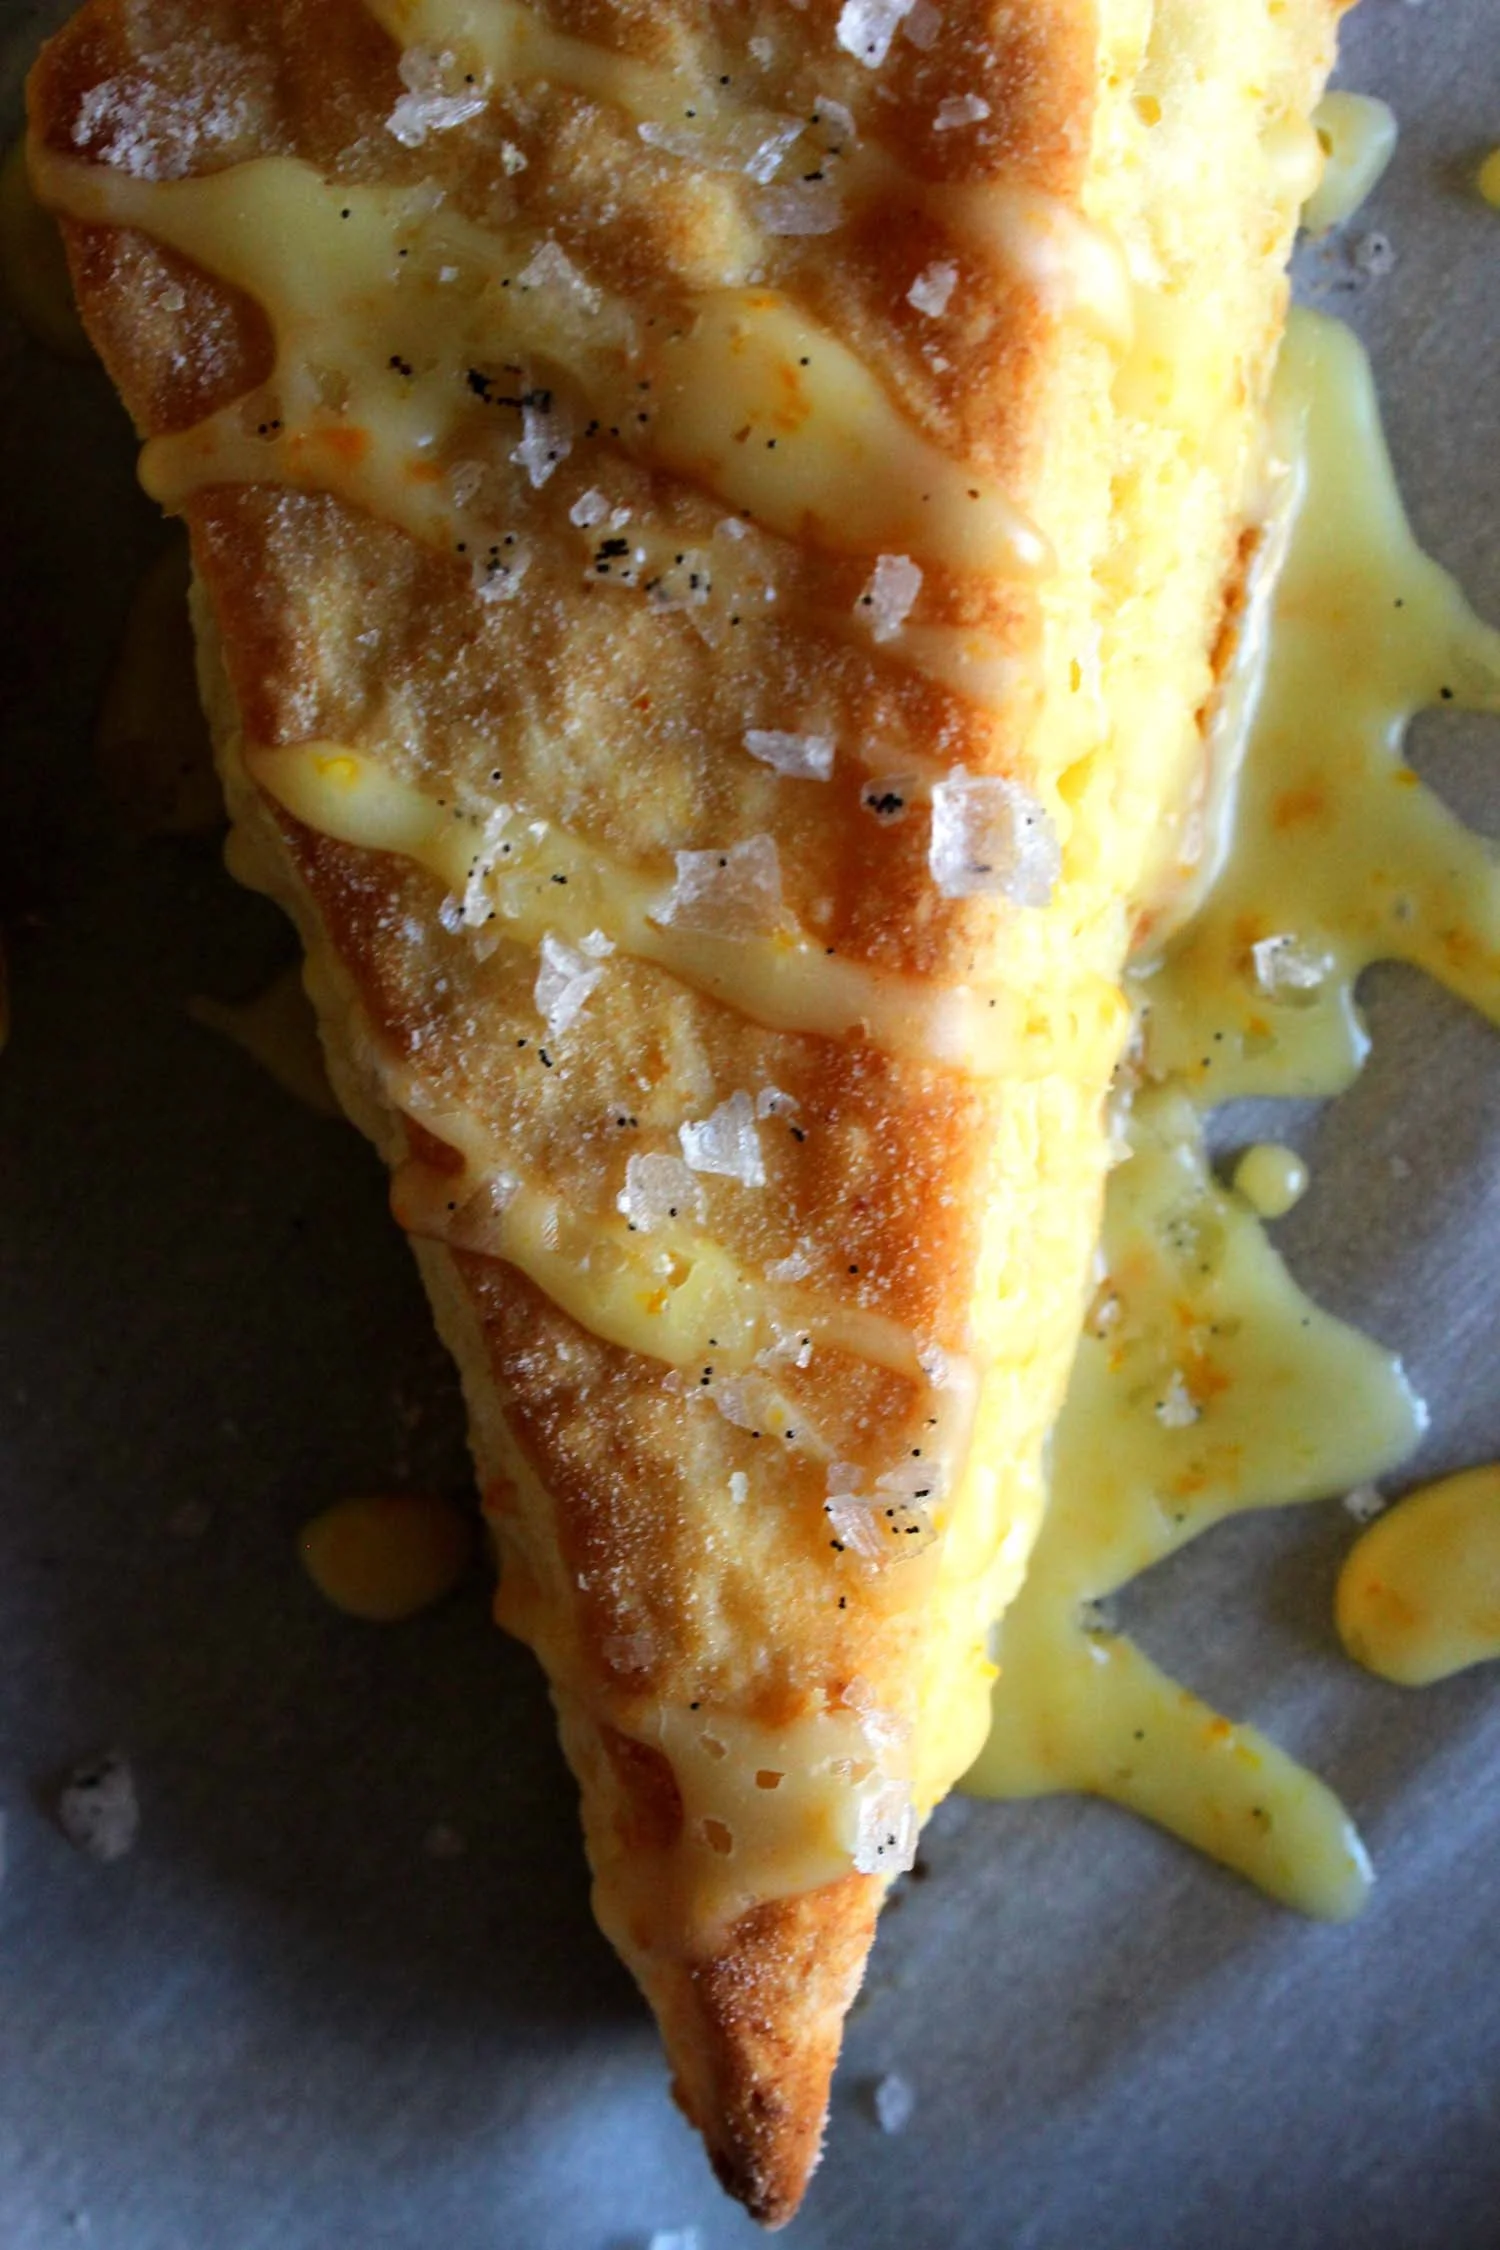
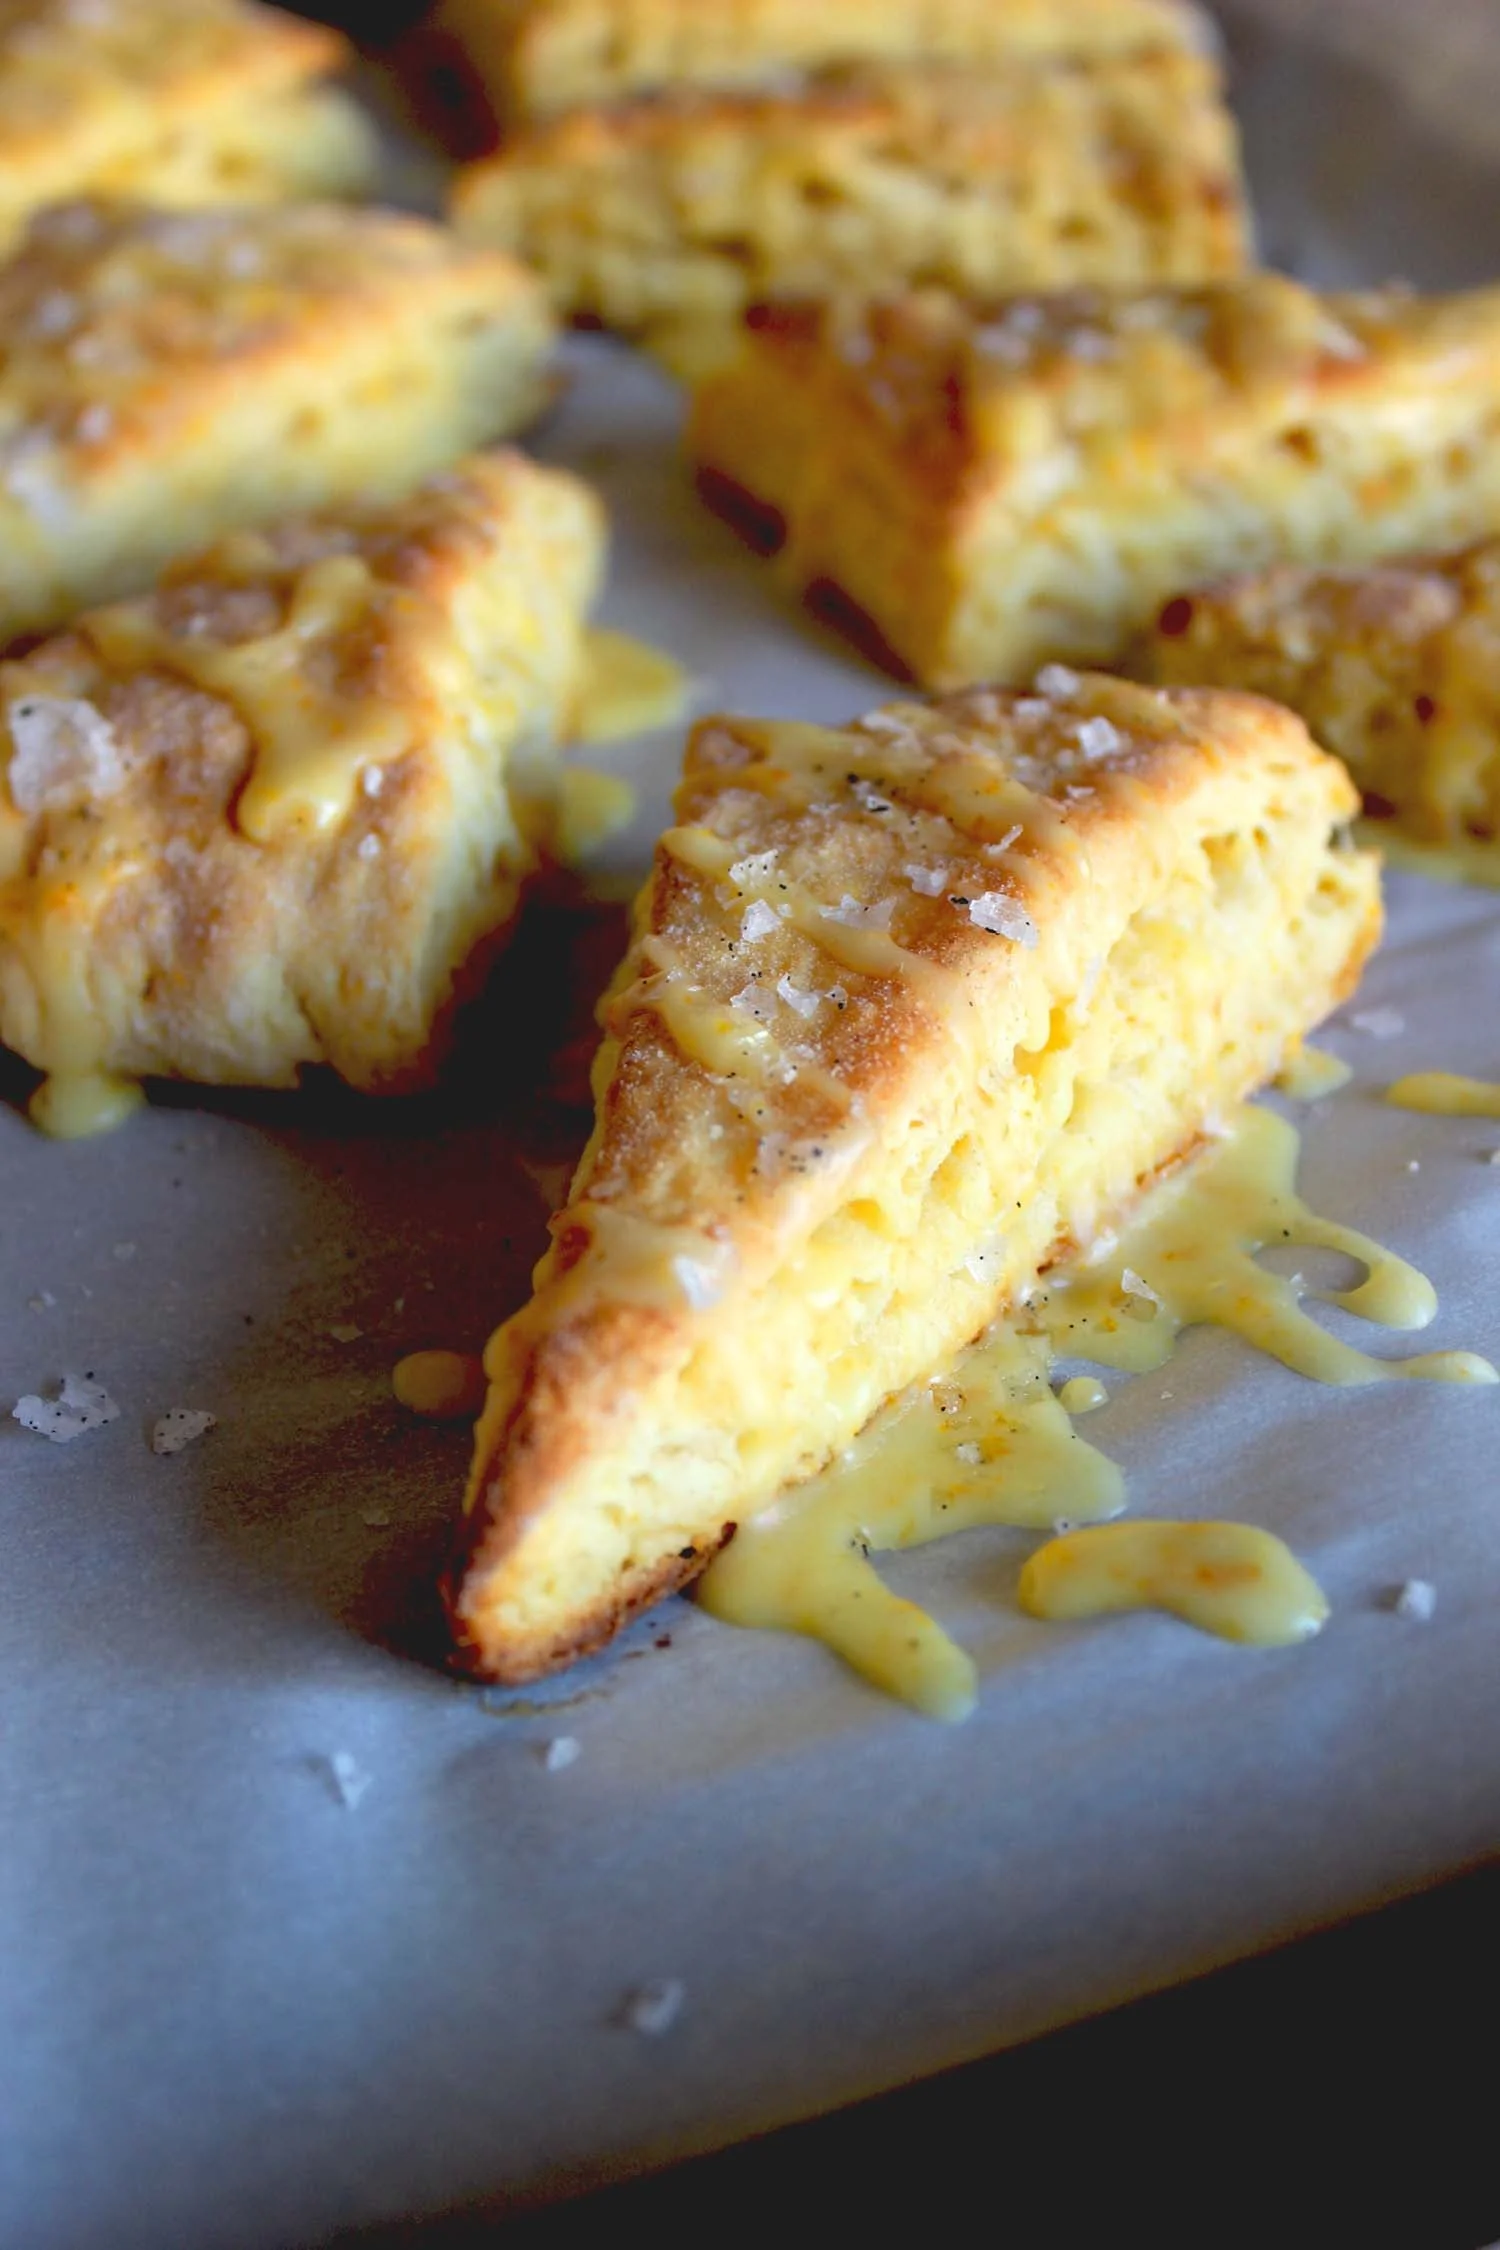
7:11 – The pound cakes are out of the oven and receiving an additional dose of flavor via an orange simple syrup. Yum.
10:23 – Time to assemble the individual Raspberry Orange Trifles. Each piece of cake is spread with raspberry jam and then layered with fresh raspberries and Orange Cream.
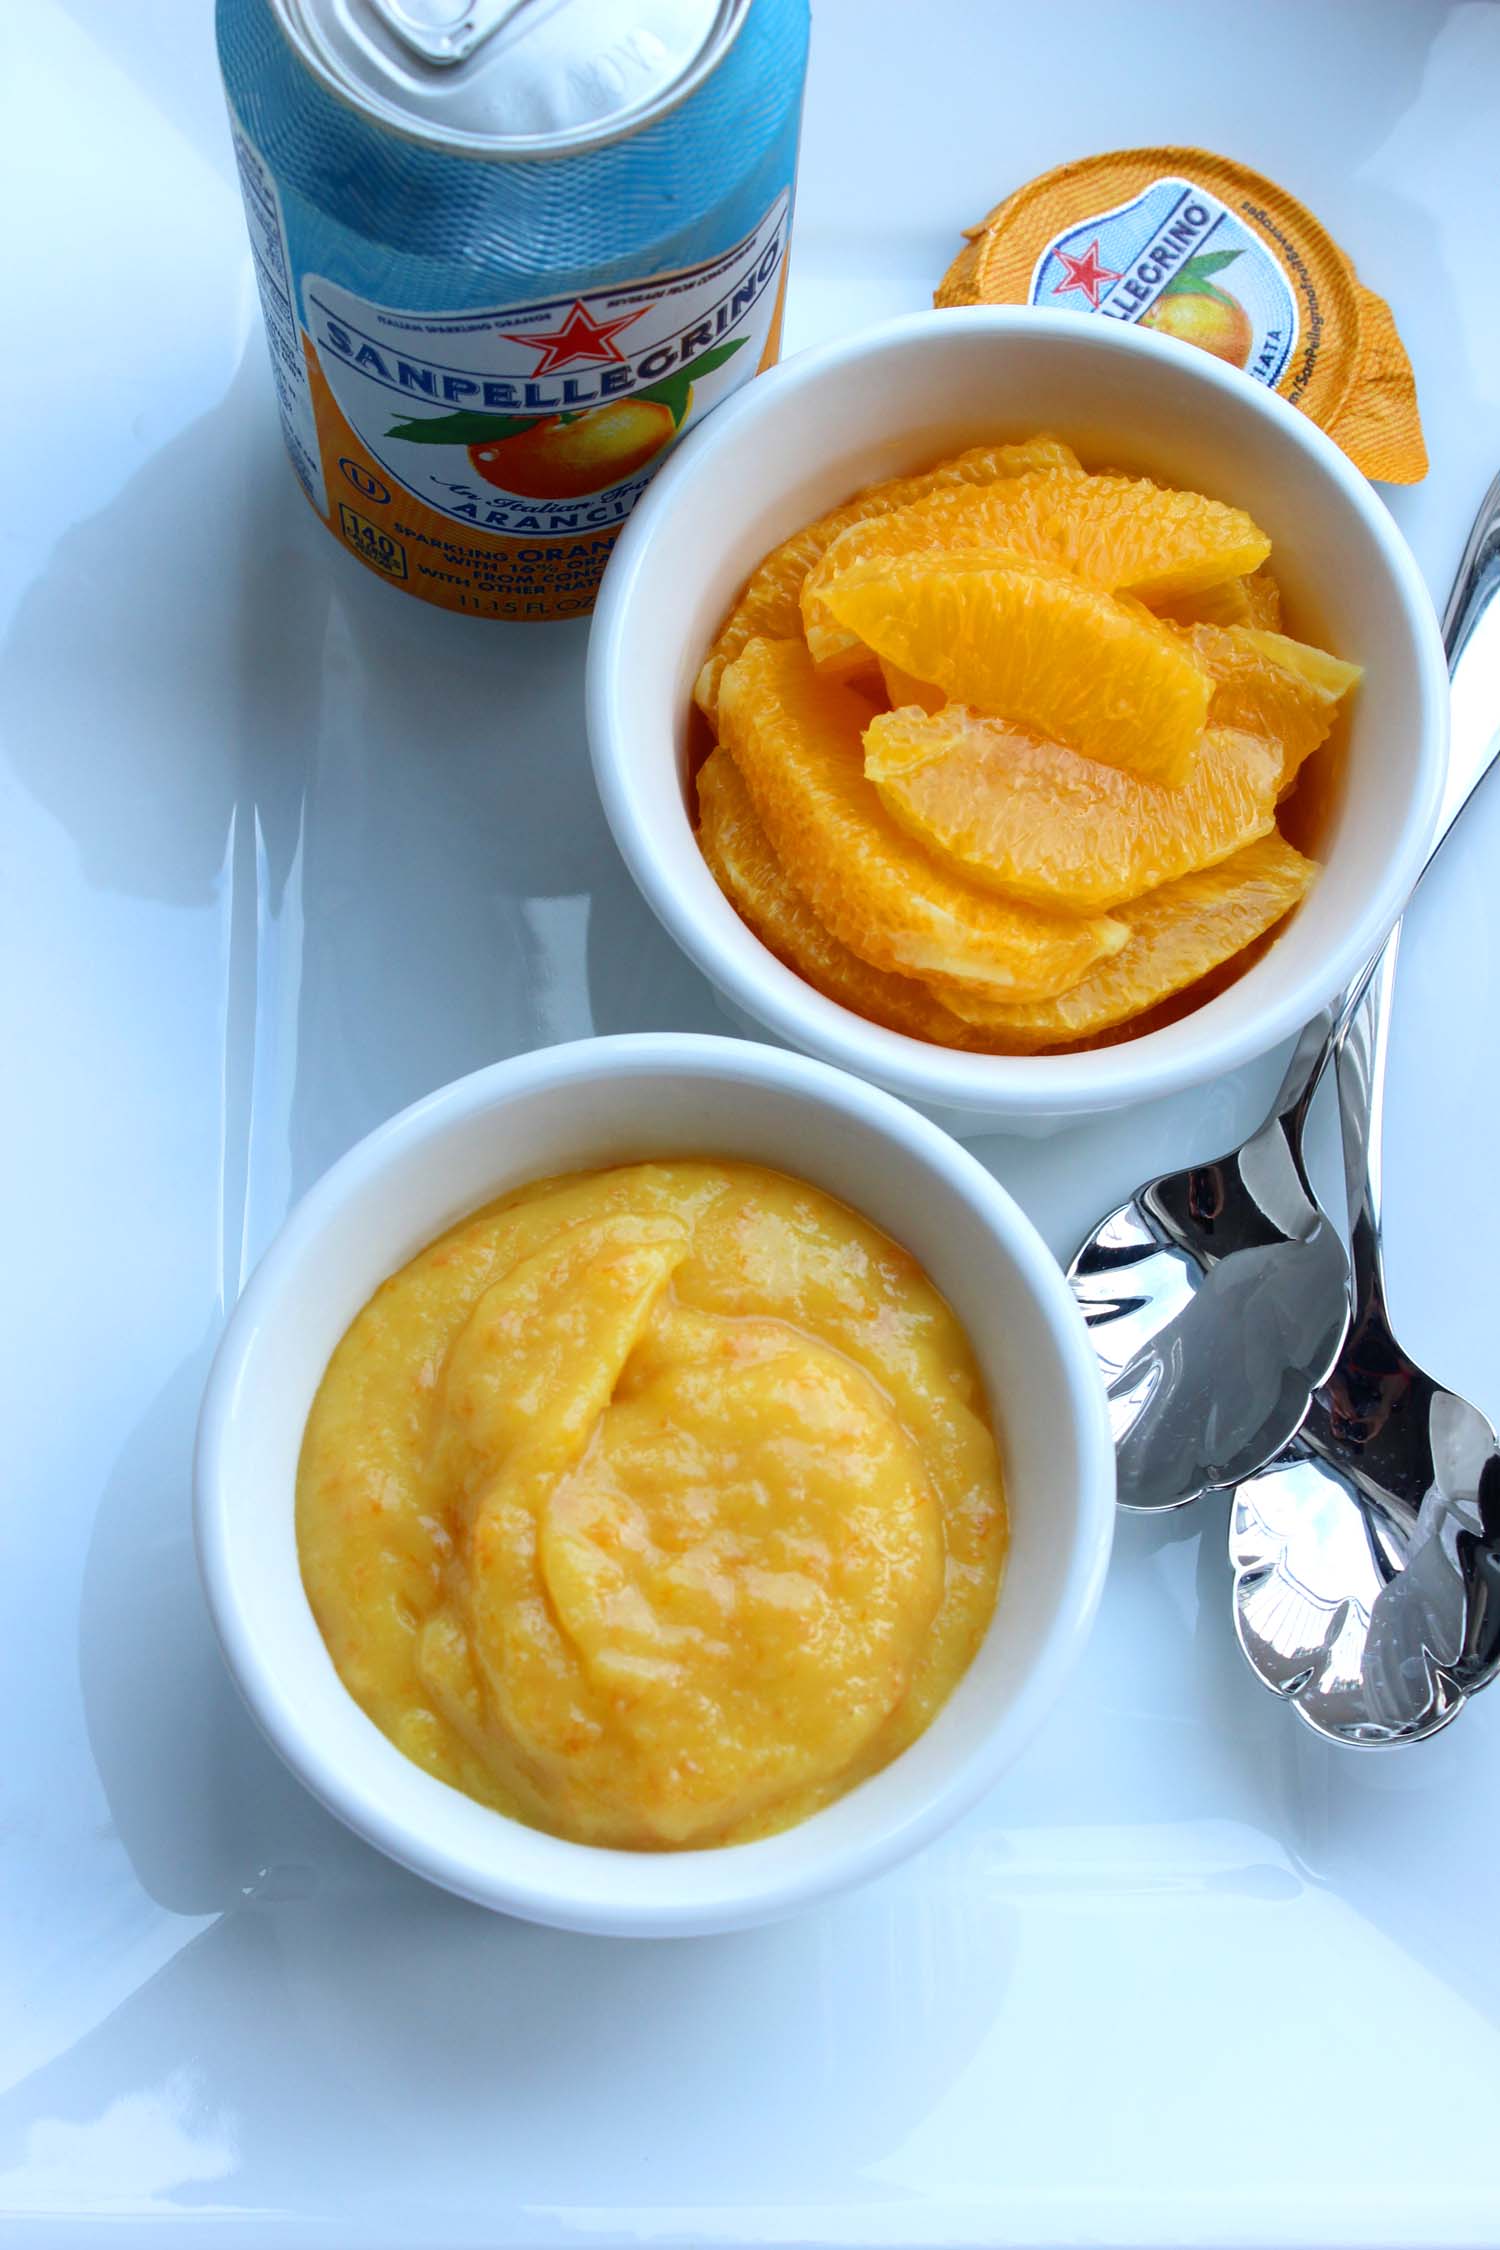
11:10 – I originally assumed that the orange cream would just be whipped cream scented with orange zest, but it actually seems to be a traditional Crème Patisserie. (You can thank the Great British Bake Off for teaching me the difference.)
12:59 – Over to “Home Sweet Home” to see what Lilee is up to and we learn that non-skid pads and a second interior vase allow her to use historic vessels for flowers without fear of damaging them.
13:36 - The trifles are complete, now it’s time for a trip to Cavaniola’s in Sag Harbor for some stuffed grape leaves, olives and feta to complete the Greek Platter.
14:47 – The Greek theme comes from Jeffrey’s request to go to Greece, but I guess that wasn’t in the travel budget for the year.
18:08 – Time to work on the rest of the main course: Spinach Pie which Ina plans to serve along side the other items she bought.
19:15 – The filling of the pie is spinach, pine nuts, feta, and parmesan held together with beaten eggs, which if I remember correctly is similar to the recipe for Spanakopita.
20:37 – Instead of a traditional butter/flour based crust, the spinach pie has a few layers of phyllo dough.
21:53 – How interesting, the phyllo crust is placed in a sauté pan and then the edges are pulled together over the top to form a little purse. Ina calls it a “top knot”.
22:29 – I wonder why she used a metal sauté pan instead of a glass pie plate? I assume she has a reason…
26:34 – The Spinach Pie is out of the oven and Ina is portioning it onto the platter. It looks like this is the sort of dish that’s just as good room temperature as it is piping hot.
27:00 – Last element: homemade lemon and garlic Hummus which forms the center of the platter. A quick drizzle of olive oil here, a sprinkle of toasted pine nuts there, some rubbed dried oregano.
28:41 – Pro Tip #4: Grouping each item on the platter in big blocks of color prevents it from looking like the “proverbial dog’s breakfast.” Lilee is in charge of bringing the food to “Home Sweet Home” while Ina collects Jeffrey.
29:52 – The surprise is revealed and the two sit down to their Greek lunch. Jeffrey seems tickled by the thoughtfulness (as he should be) and true to form says this is the best lunch and dessert ever. He will live to see another year.
Final Thoughts:
Still wishing Ina had explained the sauté pan vs. pie plate choice.
Like Jeffrey, I too wonder what the original homeowners would make of the Greek menu.
I will never tire of Ina’s “dog’s breakfast” comparison.

Valencia Orange Pound Cake | Image: Laura Messersmith
Lessons Learned:
As has probably become obvious, I am in a citrusy mood lately so naturally the Orange Pound Cake caught my attention. It’s been awhile since I made pound cake and since this one has a slightly unusual step I figured it was a good one to refresh my memory and learn a trick or two. Here are my take aways.
Room Temperature Ingredients – If you do nothing else, but do allow your butter, eggs, and buttermilk to come to room temperature then I will consider this blog post a success. But here’s the thing, to be truly effective you really need all three at the same temperature. Consider: you’ve got soft butter all beautifully creamed together with the sugar, but then add cold eggs. The butter is going to firm up and the eggs won’t incorporate the way they should. Same deal at the buttermilk stage.
Orange Zest – I halved Ina’s recipe to make just one loaf of pound cake, but intentionally left the amount of orange zest the same (1/3 cup) as in the original recipe. I wanted the orange flavor to come through loud and clear and I think oranges (unlike lemons) can sometimes be a little wimpy. Essentially doubling the zest per cake ratio made sure that wasn’t a problem.
Orange Drizzle – Again, I am all about getting the most orange flavor I can and here I’d recommend allowing the orange juice/sugar mixture to reduce a bit so the juice is slightly more concentrated. Also, to make sure the cake soaked up as much of the syrup as possible I used a toothpick to gently poke small holes across the top of the bread. The better to absorb the drizzle.
Orange Segments – Lastly, this is more of a home-ec, waste not want not tip, but once you have the zest and juice you need there will still likely be an orange or two that can be supremed and the segments served as a topping for the pound cake. The cake is lovely on its own, but a little fresh fruit makes it just that much more special.

Valencia Orange Pound Cake | Image: Laura Messersmith
Small Kitchen Friendly?
Totally. I used two medium mixing bowls, an 8x3 glass loaf pan, a hand mixer, a small sauce pan, measuring cups (liquid and dry), measuring spoons, a microplane grater, and a rubber spatula. A wire rack and rimmed sheet pan will be helpful if you don’t want the drizzle or glaze to pool around the bottom of the pound cake.
The Verdict:
This Orange Pound Cake is really flipping good. The interior crumb manages to be both moist and light simultaneously, and thanks to my extra zest the orange flavor is lively and bright. I’m sure this is fabulous in a trifle, but on it’s own or with a spoonful of fresh orange segments it caps off the meal with a fresh note. I can see making this for a summer dessert just as easily as in winter.

Valencia Orange Pound Cake | Image: Laura Messersmith