Spring Omelet with Asparagus and Peas

Spring Omelet with Asparagus and Peas | Image: Laura Messersmith

Spring Omelet with Asparagus and Peas | Image: Laura Messersmith

When life picks up its pace and it seems like there isn’t a moment to spare in between packing and unpacking for the next adventure there’s still an important question to answer: what’s for dinner? Lately the answer has been eggs – plain scrambled, fried on avocado toast, and when the planets align to make a trip to the grocery store also this Spring Vegetable Omelet.

Thank the good Lord for a main dish that can be on the table in less than 20 minutes, and still checks all the boxes for fresh, delicious, and healthy. Serve with a slice or two of whole grain – cut into golden toast soldiers if you please – and this could be breakfast, lunch, dinner or any meal in between.

Spring Omelet with Asparagus and Peas | Image: Laura Messersmith

Spring Omelet with Asparagus and Peas | Image: Laura Messersmith
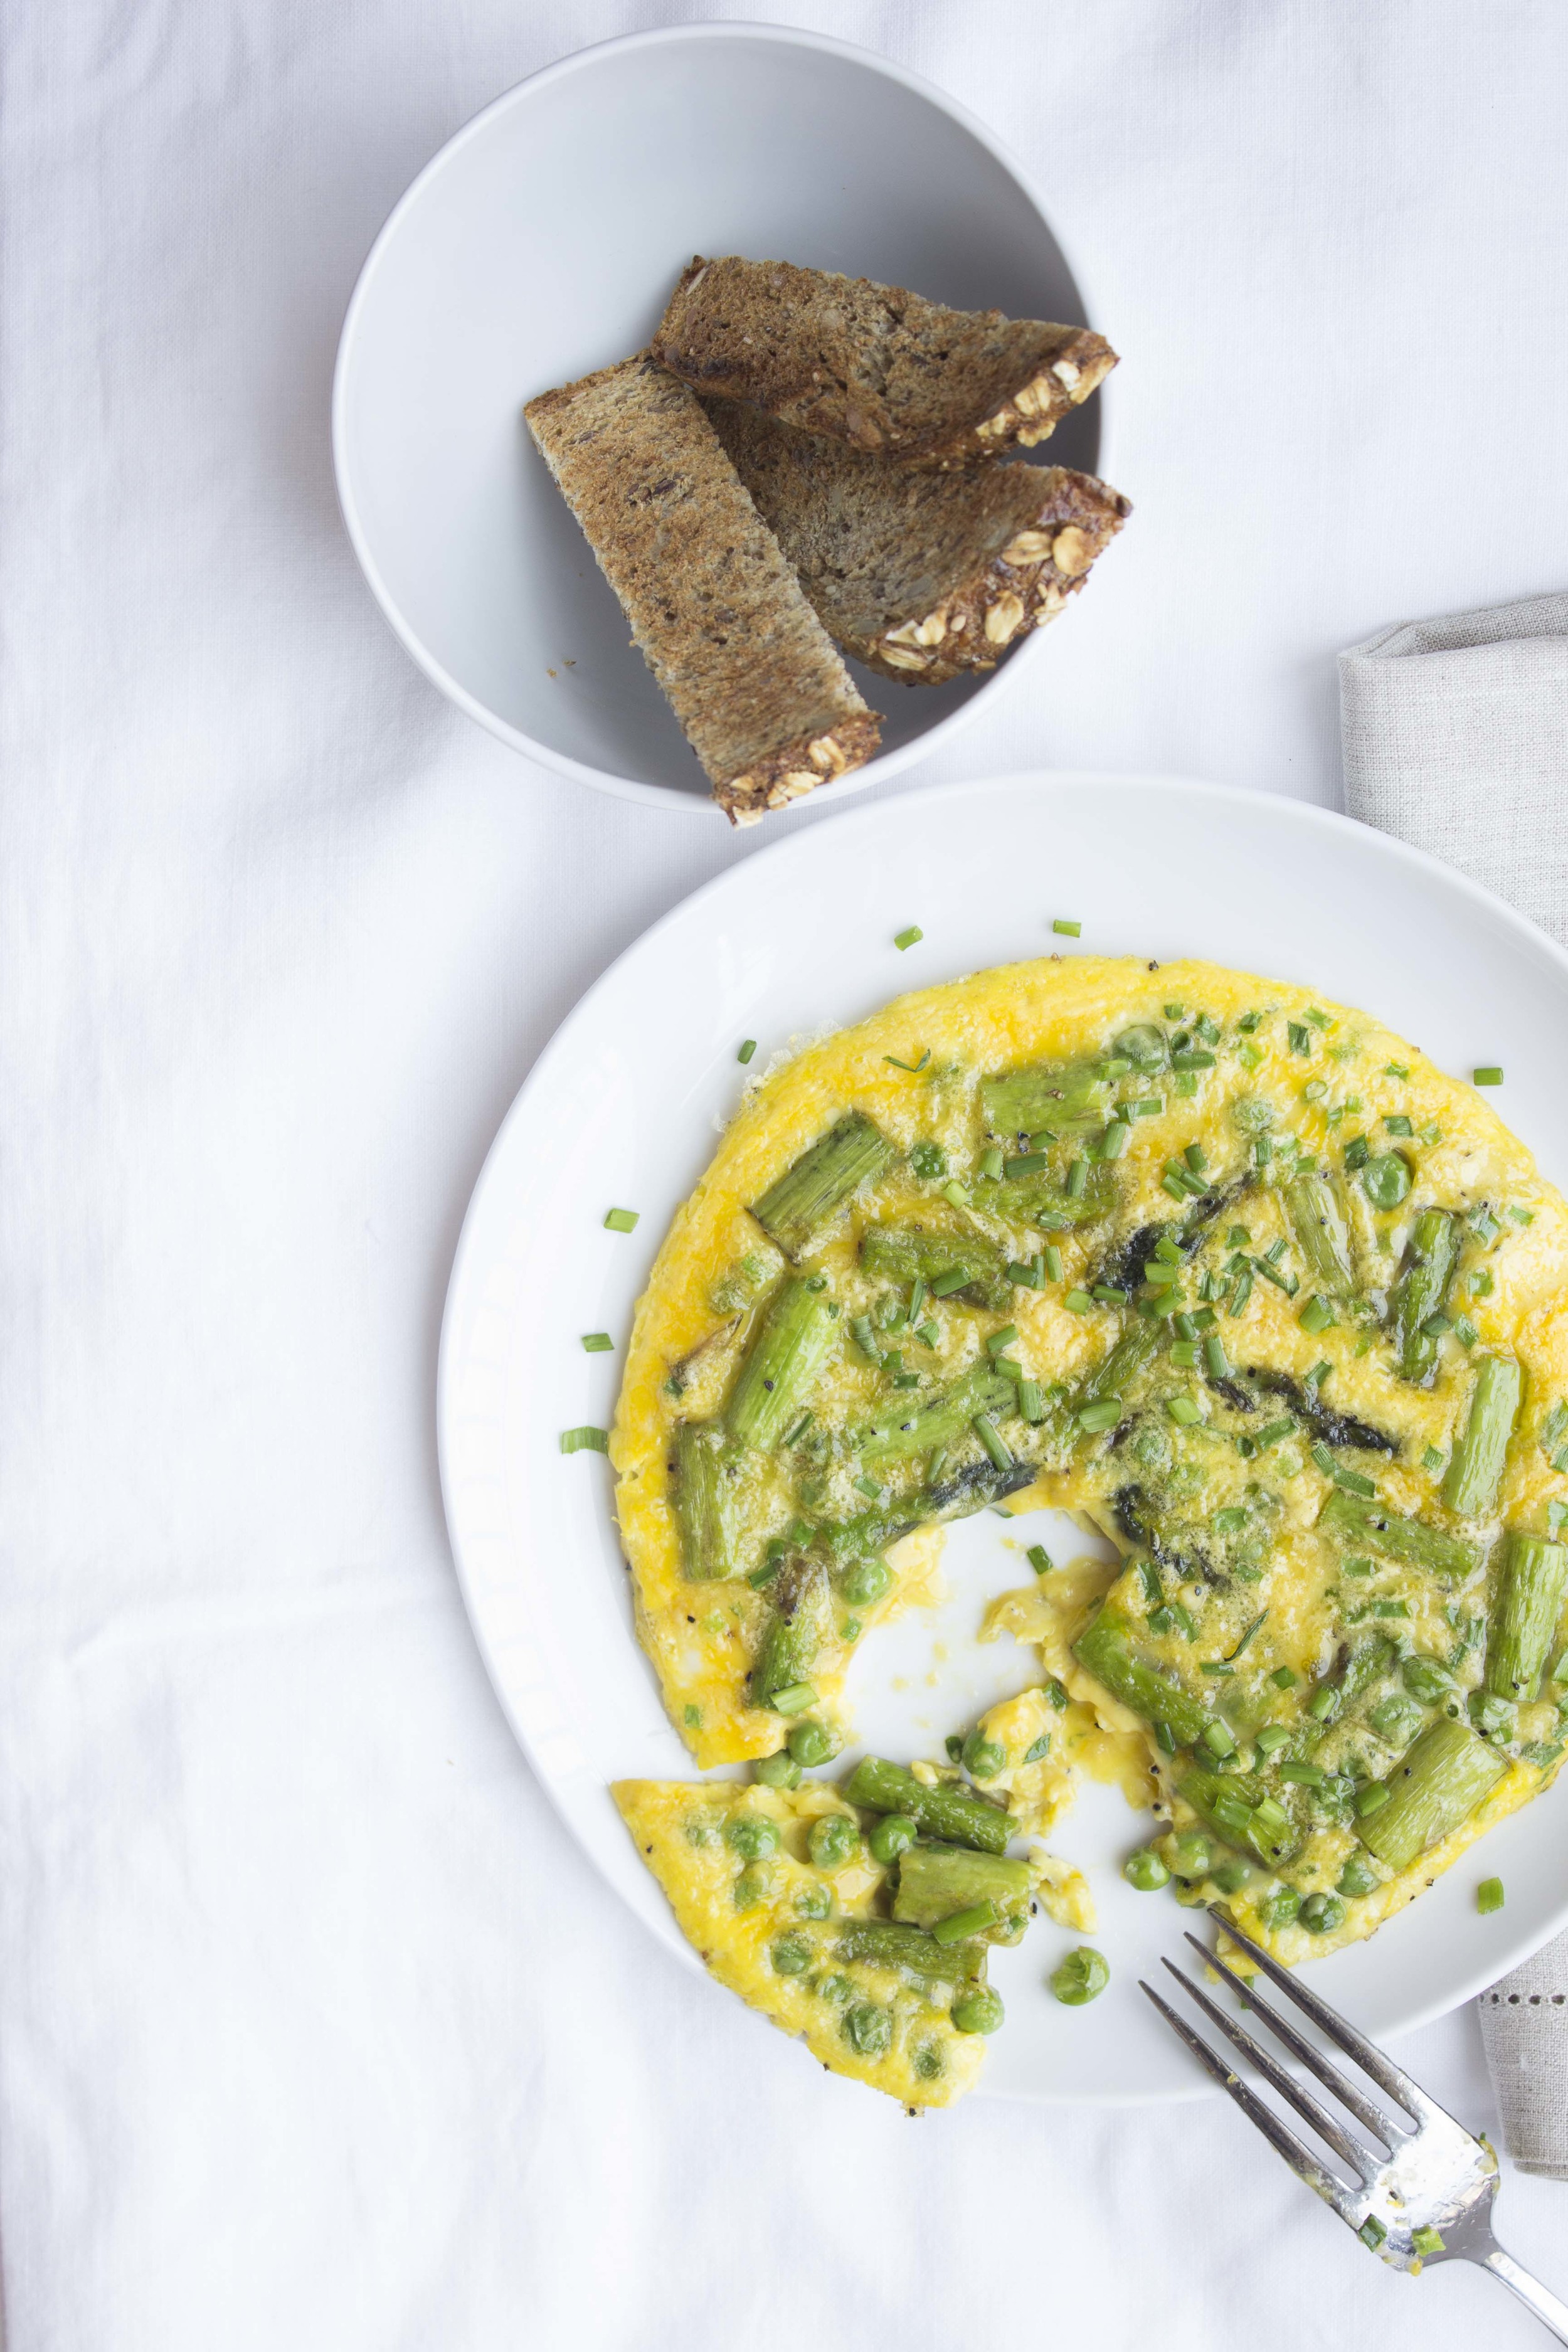
Spring Omelet with Asparagus and Peas (serves 2)

Ingredients:
8 stalks asparagus
1/2 cup English peas, shelled
2 tablespoons unsalted butter
2 tablespoons olive oil
5 eggs
3 tablespoons whole milk
1 tablespoon grated parmesan cheese
2 tablespoons minced chives
kosher salt
black pepper

Instructions:
Pre heat the oven to 350 degrees F.

Cut the asparagus spears into 1/2 inch lengths discarding the tough, woody ends. In a medium oven-safe sauté pan (8 or 10 inches), melt the butter and olive oil together. Add the asparagus and peas and cook over medium heat for 3-4 minutes until the asparagus is tender. Season with salt and pepper.

While the vegetables cook, whisk together the eggs and milk in a medium bowl, finely mince the chives, and grate the parmesan cheese.

Using a slotted spoon, remove the vegetables from the pan and set aside leaving the remaining butter and olive oil in the pan. Turn off the heat and pour the eggs into the warm pan. Scatter the parmesan cheese and half the minced chives over the eggs along with a sprinkle of salt and pepper.

Spread the asparagus and peas over the top of the eggs and immediately move the pan to the hot oven. Bake for 7-8 minutes until the eggs are firm at the edges, but the center of the omelet remains soft set.

Use a fish spatula to loosen the omelet from the pan and serve immediately with topped with a sprinkle of the reserved chives.

Inspired by Ina Garten’s Country French Omelet and Saveur Magazine’s Brown Butter Peas and Mint Omelette

Small Kitchen Friendly?
You know it. I used a medium oven-safe sauté pan, small mixing bowl, medium cutting board, chef’s knife, microplane grater, and a fish spatula. That’s it!

Spring Omelet with Asparagus and Peas | Image: Laura Messersmith

Spring Omelet with Asparagus and Peas | Image: Laura Messersmith

Spring Omelet with Asparagus and Peas | Image: Laura Messersmith

Spring Omelet with Asparagus and Peas | Image: Laura Messersmith

Honey Lemon Saffron Chicken

Honey Saffron Chicken | Image: Laura Messersmith

Honey Saffron Chicken | Image: Laura Messersmith

I’ve never been to Malibu, but after reading the Malibu Farm cookbook cover to cover it feels like I just got back from the Left Coast. Helene Henderson’s writing is straightforward and the recipes she created emphasize produce of the highest quality grown by her local community of farmers, beekeepers, and herdsmen. The dishes are homey and familiar, something you could throw together at a moment’s notice, with enough international flair to feel fresh.

Malibu Farm Cookbook

One caveat – the preparations are simple and the instructions bare bones assuming the reader knows details like how hot a skillet should be to pan-fry fish or cook an egg. Most recipes and their ingredients are approachable, perhaps with the exception of the whole roasted lamb or boar sausage, but even experienced cooks will find lots to inspire with these riffs on California cuisine. At this point the pages of my copy are bristling with tabs noting the dishes I want to make – particularly exciting as the summer approaches and ingredients like sweet corn and plums come into season.

For the moment I’ve settled on the Honey Lemon Saffron Chicken which pairs the savory depth of chicken legs with the bright, light lemon and honey marinade. The skin turns deep mahogany as the sugar in the honey burns and caramelizes. Finishing the cooking in the oven maintains the juiciness of the meat and ensures it’s perfectly done when the pan emerges.

Honey Lemon Saffron Chicken (serves 4)

Ingredients:
2 tablespoons butter
1 teaspoon (1 medium clove) grated garlic
3 tablespoons wildflower honey
1 pinch saffron strands
1/4 cup (1 large) fresh lemon juice
4 bone-in, skin on chicken legs
kosher salt

Instructions:
In a small sauté pan, cook the butter and grated garlic together over low heat for 4-5 minutes or until the garlic turns soft and fragrant. Off the heat, stir in the honey and juice from the lemon. Allow to cool.

Sprinkle both sides of the chicken legs liberally with kosher salt. Place in a ziptop plastic bag and pour in the cooled marinade. Press out the air and seal tightly making sure each piece of chicken is coated in the marinade. Refrigerate for at least 4 hours or overnight.

When ready to cook, pre-heat the oven to 375 degrees F.

In a large sauté pan, heat 2-3 teaspoons of olive oil over medium heat and place the pieces of chicken skin side down in the pan. Cook for 5-7 minutes until the chicken skin is deep brown and crisp. Turn the chicken over, skin side up, and place in the oven. Roast for 20-15 minutes or until an instant read thermometer registers 170 degrees. Serve immediately.

Re-written and adapted from Helene Henderson’s Honey Lemon Saffron Chicken in Malibu Farm Cookbook (page 111).

Small Kitchen Friendly?
Surprisingly, yes! I used one small sauté pan, one large sauté pan, a small cutting board, utility knife, tongs, a microplane grater, and a ziplock bag.

I received this book from Blogging for Books for this review. All opinions are my own.

Honey Saffron Chicken | Image: Laura Messersmith

Honey Saffron Chicken | Image: Laura Messersmith

Herb Roasted Cod

Herb Roasted Cod | Image: Laura Messersmith

Herb Roasted Cod | Image: Laura Messersmith

Each week I follow along with Ina Garten (aka the Barefoot Contessa) and attempt to recreate one of her dishes in my tiny New York City kitchen. The catch? This is my version of cooking school and this week I’m making Herb Roasted Fish for the first time. I’ll share both my successes and “challenges” along the way along with suggestions on how to adapt Ina’s recipe to a small kitchen.

Episode: “Italian at Home”

The Set-up: Ina, Jeffrey and their friends are recreating recipes from a memorable trip to Italy.

The Menu: Herb Roasted Fish, Creamy Parmesan Polenta, Celery and Parmesan Salad, Affogato Sundaes

0:49 – Ina and Jeffrey took a trip to Florence, Italy recently and it seems like he won the ordering game at Cibrèo when he ordered a baked fish. Ina’s making her version at home.

1:30 – The technique is a little different – the Herb Roasted Fish baked in parchment paper which allows the cod and seasonings to steam together as they cook.

2:45 – Wow, this comes together so fast. Once the fish has its own sheet of parchment it’s topped with a few sprigs of thyme, a couple large olives, and a smattering of salt, pepper and olive oil. #howeasyisthat?

3:19 – Now that the fish is prepped – Ina is brushing the edges with egg wash to help seal the packets. It’s like a little craft project.

4:22 – PS: I see Ina doing this on her lovely butcher block cutting boards, but I’d probably just work straight on the baking sheet and save myself some clean up.

5:38 – Dinner is going to be served “al fresco” and the table setting is suitably rustic: a linen-lined bread basket filled with fresh lemons and lemon leaves.

6:01 –The theme is modern square plates, napkins, glasses lined up in a row and Ina is channeling her inner butler; making sure the spacing is just so. She thinks the Italians are so effortlessly stylish, but she is too!

9:33 – On to the Celery and Parmesan Salad. Ina says that Italians use celery more than Americans and I agree – why have I relegated celery to a filler or garnish?

10:40 – Per usual, Ina is making her own dressing but this time it’s a lemon and celery seed vinaigrette, not her traditional mustard-based version.

11:55 – The dressing also involves anchovy paste – another ingredient I have an odd relationship with. When I don’t know it’s there we’re cool, but it kinda weirds me out.

12:14 – One thing about a celery salad is that it probably stays crisp (even when dressed) for quite a long time.

13:29 Over to Barbara and Bobby Liberman who are on the hunt for wine. They’re sticking with Italian vineyards – a red for appetizers and a white for dinner. Success!

14:36 – For appetizers Ina is going rustic and casual – a few salted cashews, marinated olives, and some artisanal potato chips.

15:07 – It really doesn’t get easier than this. Step 1: open package, Step 2: place in silver bowl, Step 3: profit.

18:42 – Jeffrey, Bobby, and Barbara are relaxing in the backyard over the appetizers and reminiscing about their trip while Ina cooks Creamy Parmesan Polenta.

19:35 – Full disclosure: I am horrendous at cooking polenta it regularly comes out too thick and gummy. So, let listen to Ina’s words of polenta wisdom instead - whisk first to prevent lumps, then stir with a wooden spoon over low heat. It sounds so simple!

20:18  – Jeffrey makes an appearance to top off Ina’s glass of wine and gets to help out by putting the Herb Roasted Fish in the oven. He also wins husband points for checking on Ina.

21:00 – Time to finish the polenta by adding the parmesan cheese and plate the Celery and Parmesan Salad with shavings of parmesan, toasted walnuts, and parsley leaves.

22:11 – Dinner is served! Barbara immediately recognizes the fish recipe and exclaims how lovely it is. Well played, Ina.

23:39 – A mutual agreement that no one knows how to ask for wine in Italian, even though Bobby can (allegedly) order a bottle in six languages. That seems like a miss if you ask me, time to take some Italian lessons Mr. Liberman.

27:22 – While her guests wind down from dinner Ina’s working on dessert: Affogato Sundaes, which combine both dessert and coffee by pouring espresso over vanilla and hazelnut ice cream. Sounds like heaven.

28:36 – She’s using a Nespresso machine to brew espresso shots. Some day when we have slightly more counter space…

29:54 – These are insane: coffee liqueur, homemade whipped cream, and chopped chocolate covered espresso beans. I want to do a face-plant into these bowls. Amazing.

Final Thoughts:
What a fun idea to recreate a memorable dinner from a trip with friends.

Trust Ina to make a themed dinner so elegant and effortless with simple ingredients.

I don’t think I ever fully appreciated the power of a silver bowl to make everything feel special and intentional.

Herb Roasted Cod | Image: Laura Messersmith

Herb Roasted Cod | Image: Laura Messersmith

Lessons Learned:
I’ve wanted to try cooking en papillote - French for "in parchment" - or al cartoccio – since this is an episode about Italian cooking – for a long time and as I watched Ina cook the Herb Roasted Fish I was inspired to finally do it. What’s a bit funny to me is that if you replace the elegant cod with something like trout you’re really just one step removed from campfire cooking.

Fish Selection - It is worth asking your seafood counter helper for thicker, meaty pieces of cod as I find they stand up to the roasting process better. If, you have some variation in size among the filets, then I’d recommend putting the smaller ones on the same sheet pan and staggering their into the oven by a minute or two. That way everything is done at the same time and is perfectly cooked.

Packet Construction – I tried two different ways of sealing the packets – Ina’s empanada style and what I think of as deli style (rolled toward the middle and then tucked under. In both cases without the egg wash to seal them closed they did leak a bit but the results were still excellent.

Seasoning – The cooking process is somewhere between poaching and steaming so it’s important to add plenty of seasoning so that the delicate flavor of the fish is enhanced and the liquid creates a delicious sauce. I made a few changes to Ina's original recipe swapping in butter butter for the olive oil and capers for the olives.

Herb Roasted Cod | Image: Laura Messersmith

Herb Roasted Cod | Image: Laura Messersmith

Herb Roasted Fish in Parchment Paper (4 servings)

Ingredients:
4 (8 ounce) boneless snapper or cod fillets
2 teaspoon kosher salt
1 teaspoon freshly ground black pepper
1/4 cup (2-3 lemons) freshly squeezed lemon juice
2 tablespoons unsalted butter
4 teaspoons (3-4 sprigs) fresh thyme
2 teaspoons drained capers

Instructions:
Preheat the oven to 400 degrees F.

Pat the fish dry with paper towels and place each piece on a sheet of parchment paper. Sprinkle both sides with salt and pepper, then place 1/2 tablespoon of butter under each filet. Drizzle with lemon juice and scatter the thyme leaves and capers over the top. Repeat with the other three pieces of fish evenly dividing the seasonings among the pieces of fish.

Beat the egg together with 1 tablespoon of water for an egg wash. Brush the egg wash around the edge of the parchment paper and fold it in half. Carefully fold the edge of the parchment paper under and around the fish to make a package. Place the package on a sheet pan and cook for 12 to 15 minutes, until the fish is cooked through. Serve hot in the parchment paper.

Lightly adapted and rewritten from Ina Garten’s Herb Roasted Fish.

Small Kitchen Friendly?
1,000,000%. All I used were 2 rimmed sheet pans, a chef’s knife, small cutting board, measuring spoons (but really you could just estimate, this is a forgiving recipe) and a fish spatula. Parchment paper and paper towels are essential here.

The Verdict:
Lord this is good. Trust Ina to pinpoint a restaurant quality meal that takes so little effort you could almost forget you're cooking. Delicately poached code in its own buttery, lemony, faintly herbal juices while the capers add their own briny punch to the mix. Point 2: it will never cease to be a teat that in the time it takes my rickety little oven to heat up, I can have the entire main course prepped and ready to go.

Herb Roasted Cod | Image: Laura Messersmith

Herb Roasted Cod | Image: Laura Messersmith


One-Bowl Coconut Almond Granola

One Bowl Coconut Almond Granola | Image: Laura Messersmith

One Bowl Coconut Almond Granola | Image: Laura Messersmith

I think I’ve teased this recipe enough with various photos on social media and now it’s time to actually reveal what’s become essentially its own food group in our household. I’ve been tinkering with the ingredients and baking time and I can safely say that we’re addicted. It hasn’t come to marking how much is left in the mason jar before I leave the apartment, but we’re getting there.

Yup, it tastes that good. Lightly sweet, plenty of crunch, lovely toasted coconut and flaked almonds. Excellent sprinkled over yogurt with a handful of blueberries or some pieces of fresh pineapple. What’s even better: all the ingredients can hang out in the pantry, no special trip to the grocery store required, and it only takes one bowl. So even when we’re reaching critically low levels we’re really only about 30 minutes away from a fresh batch.

One Bowl Coconut Almond Granola | Image: Laura Messersmith

One Bowl Coconut Almond Granola | Image: Laura Messersmith

One-Bowl Coconut Almond Granola (yield 2 1/2 cups)

Ingredients:
1 1/2 cups old-fashioned oats
1/4 cup vanilla whey protein powder
2 tablespoons lightly packed brown sugar
1 teaspoon ground ginger
1/2 teaspoon ground cinnamon
1/2 teaspoon salt
4 tablespoons pure maple syrup
3 tablespoons olive oil
1/2 teaspoon pure vanilla extract
1/3 cup raw sliced almonds
1/3 cup unsweetened flaked coconut
1/3 cup dried apricots, sliced

Instructions:
Place a rack in the center of the oven and preheat oven to 350 degrees F. Line a small rimmed baking sheet with parchment paper and set aside.

In a medium bowl, combine oats, vanilla protein powder, brown sugar, ginger cinnamon, and salt. (If you’re not into protein powder you can leave it out – just keep an eye on your baking times – or sub in whole wheat flour.)

Pour the olive oil, maple syrup, and vanilla extract onto the dry ingredients and stir until the oats are evenly coated and the granola is well mixed.

Spread the granola mixture in an even layer on the prepared rimmed baking sheet and bake at 350 degrees F. for 8 minutes. Remove from the oven, stir to break up the clusters and sprinkle the almonds evenly over the granola. Bake for another 8 minutes, again stirring before adding the flaked coconut. Bake for a final 6-8 minutes until the granola is golden brown.

Remove from the oven, the slide the parchment paper and granola onto a wire rack and allow to cool for about 10 minutes before adding the dried apricot pieces.

Allow the entire mixture to cool completely before storing or serving. Store in an airtight container at room temperature. Serve with vanilla greek yogurt and fresh fruit.

Adapted from Small Batch Granola by Joy the Baker.

One Bowl Coconut Almond Granola | Image: Laura Messersmith

One Bowl Coconut Almond Granola | Image: Laura Messersmith

Small Kitchen Friendly?
Absolutely. I used a medium mixing bowl, measuring cups and spoons, a rubber spatula, rimmed baking sheet, and a wire cooling rack. Parchment paper will prevent the granola from browning too quickly and helps with the cooling process.

The Verdict:
Our granola consumption has gone up 1000% since I started making my own. It’s just the right amount of sweetly spicy, the oats and almonds give it enough satisfying heft, and the apricots are pleasantly chewy. We often bring along a small container to jazz up a cup of yogurt, and it makes a parfait or dish of ice cream feel like a treat. I also love that the basic oat mixture is endlessly adaptable to what’s in the pantry, so expect more variations down the road.

One Bowl Coconut Almond Granola | Image: Laura Messersmith

One Bowl Coconut Almond Granola | Image: Laura Messersmith