Honey Rosé Plum Cobbler

Honey Rosé Plum Cobbler | Image: Laura Messersmith

Honey Rosé Plum Cobbler | Image: Laura Messersmith

I adore fall and the smoky scent of leaves, the crisp brightness, the enjoyment of cool cheeks and a cozy sweater. I anticipate the energy change from the hot laziness of summer, but I also sort of dread it – the beginning of the all too rapid transition into full-on winter. Slushy side walks, cold fingers, wearing my duck boots nearly 24/7 – no thanks.

But let’s focus on the here and now – the blazing blue skies the last lingering summer produce. Who doesn’t need a great late-summer early-fall recipe to take advantage of the glorious wealth of plums that hit the markets in September and generously hang on until October? Definitely not a delicate berry, but a bit more tender-hearted than the sturdy apples and pears to come in oh like t-minus 1 week (not that I’m really complaining.)

Honey Rosé Plum Cobbler | Image: Laura Messersmith

Honey Rosé Plum Cobbler | Image: Laura Messersmith

Plums have the depth to stand proudly alongside other robust flavors and add their tart sweetness to the dry rosé. This cobbler topped with buttery dough – is waiting to grace your dinner table.

Honey-Rosé Plum Cobbler (serves 6)

Ingredients:
1 3/4 cups, plus 2 tablespoons all-purpose flour, divided
1/4 cup sugar
2 teaspoons baking powder
1/4 teaspoon salt
1/2 cup, plus 2 tablespoons whole milk, divided
1/3 cup olive oil
2/3 cup dry rosé wine
1/3 cup clover honey
2 1/2 pounds assorted plums, pitted and cut into 8 wedges each
2 tablespoons coarse sugar, aka sugar in the raw

Optional for serving: ice cream or whipped cream

Instructions:
Preheat oven to 400 degrees F. Brush 6 oven-safe ramekins with softened butter.

For the biscuits, combine the 1 3/4 cups flour, 1/4 cup sugar, baking powder, and salt in a medium bowl. Add 1/2 cup milk and olive oil to the flour mixture. Stir to combine. Cover with plastic wrap, and set aside.

For filling, combine the wine, honey in an extra-large skillet whisk in remaining 2 tablespoons flour. Stir in the plums. Cook and stir over medium-high heat about 8 minutes or until thickened and bubbly. Remove from heat; keep warm.

Unwrap dough and roll out to 1/2-inch thickness on a floured surface. Cut into rounds using a 1-inch round cutter. Divide plums among the ramekins filling nearly to the tops. Arrange the biscuits over the filling, slightly overlapping as needed. Brush with the remaining 2 tablespoons of milk and sprinkle the biscuits with the coarse sugar.

Bake for 15-20 minutes or until biscuits are golden. Place a baking sheet below the dish to catch an drips during baking.

Remove from oven and let stand 30 minutes before serving with a scoop of ice cream or whipped cream.

Adapted and lightly re-written from Better Homes and Gardens’ Honey Rosé Plum Cobbler by David Bonom.

Honey Rosé Plum Cobbler | Image: Laura Messersmith

Honey Rosé Plum Cobbler | Image: Laura Messersmith

Small Kitchen Friendly?
I used 6 (7 ounce) oven-safe ramekins, pastry brush, medium mixing bowl, measuring cups & spoons, liquid measuring cup, spatula, large skillet, whisk, chef’s knife, medium cutting board, small fluted biscuit cutter, and rimmed baking sheet.

Honey Rosé Plum Cobbler | Image: Laura Messersmith

Honey Rosé Plum Cobbler | Image: Laura Messersmith

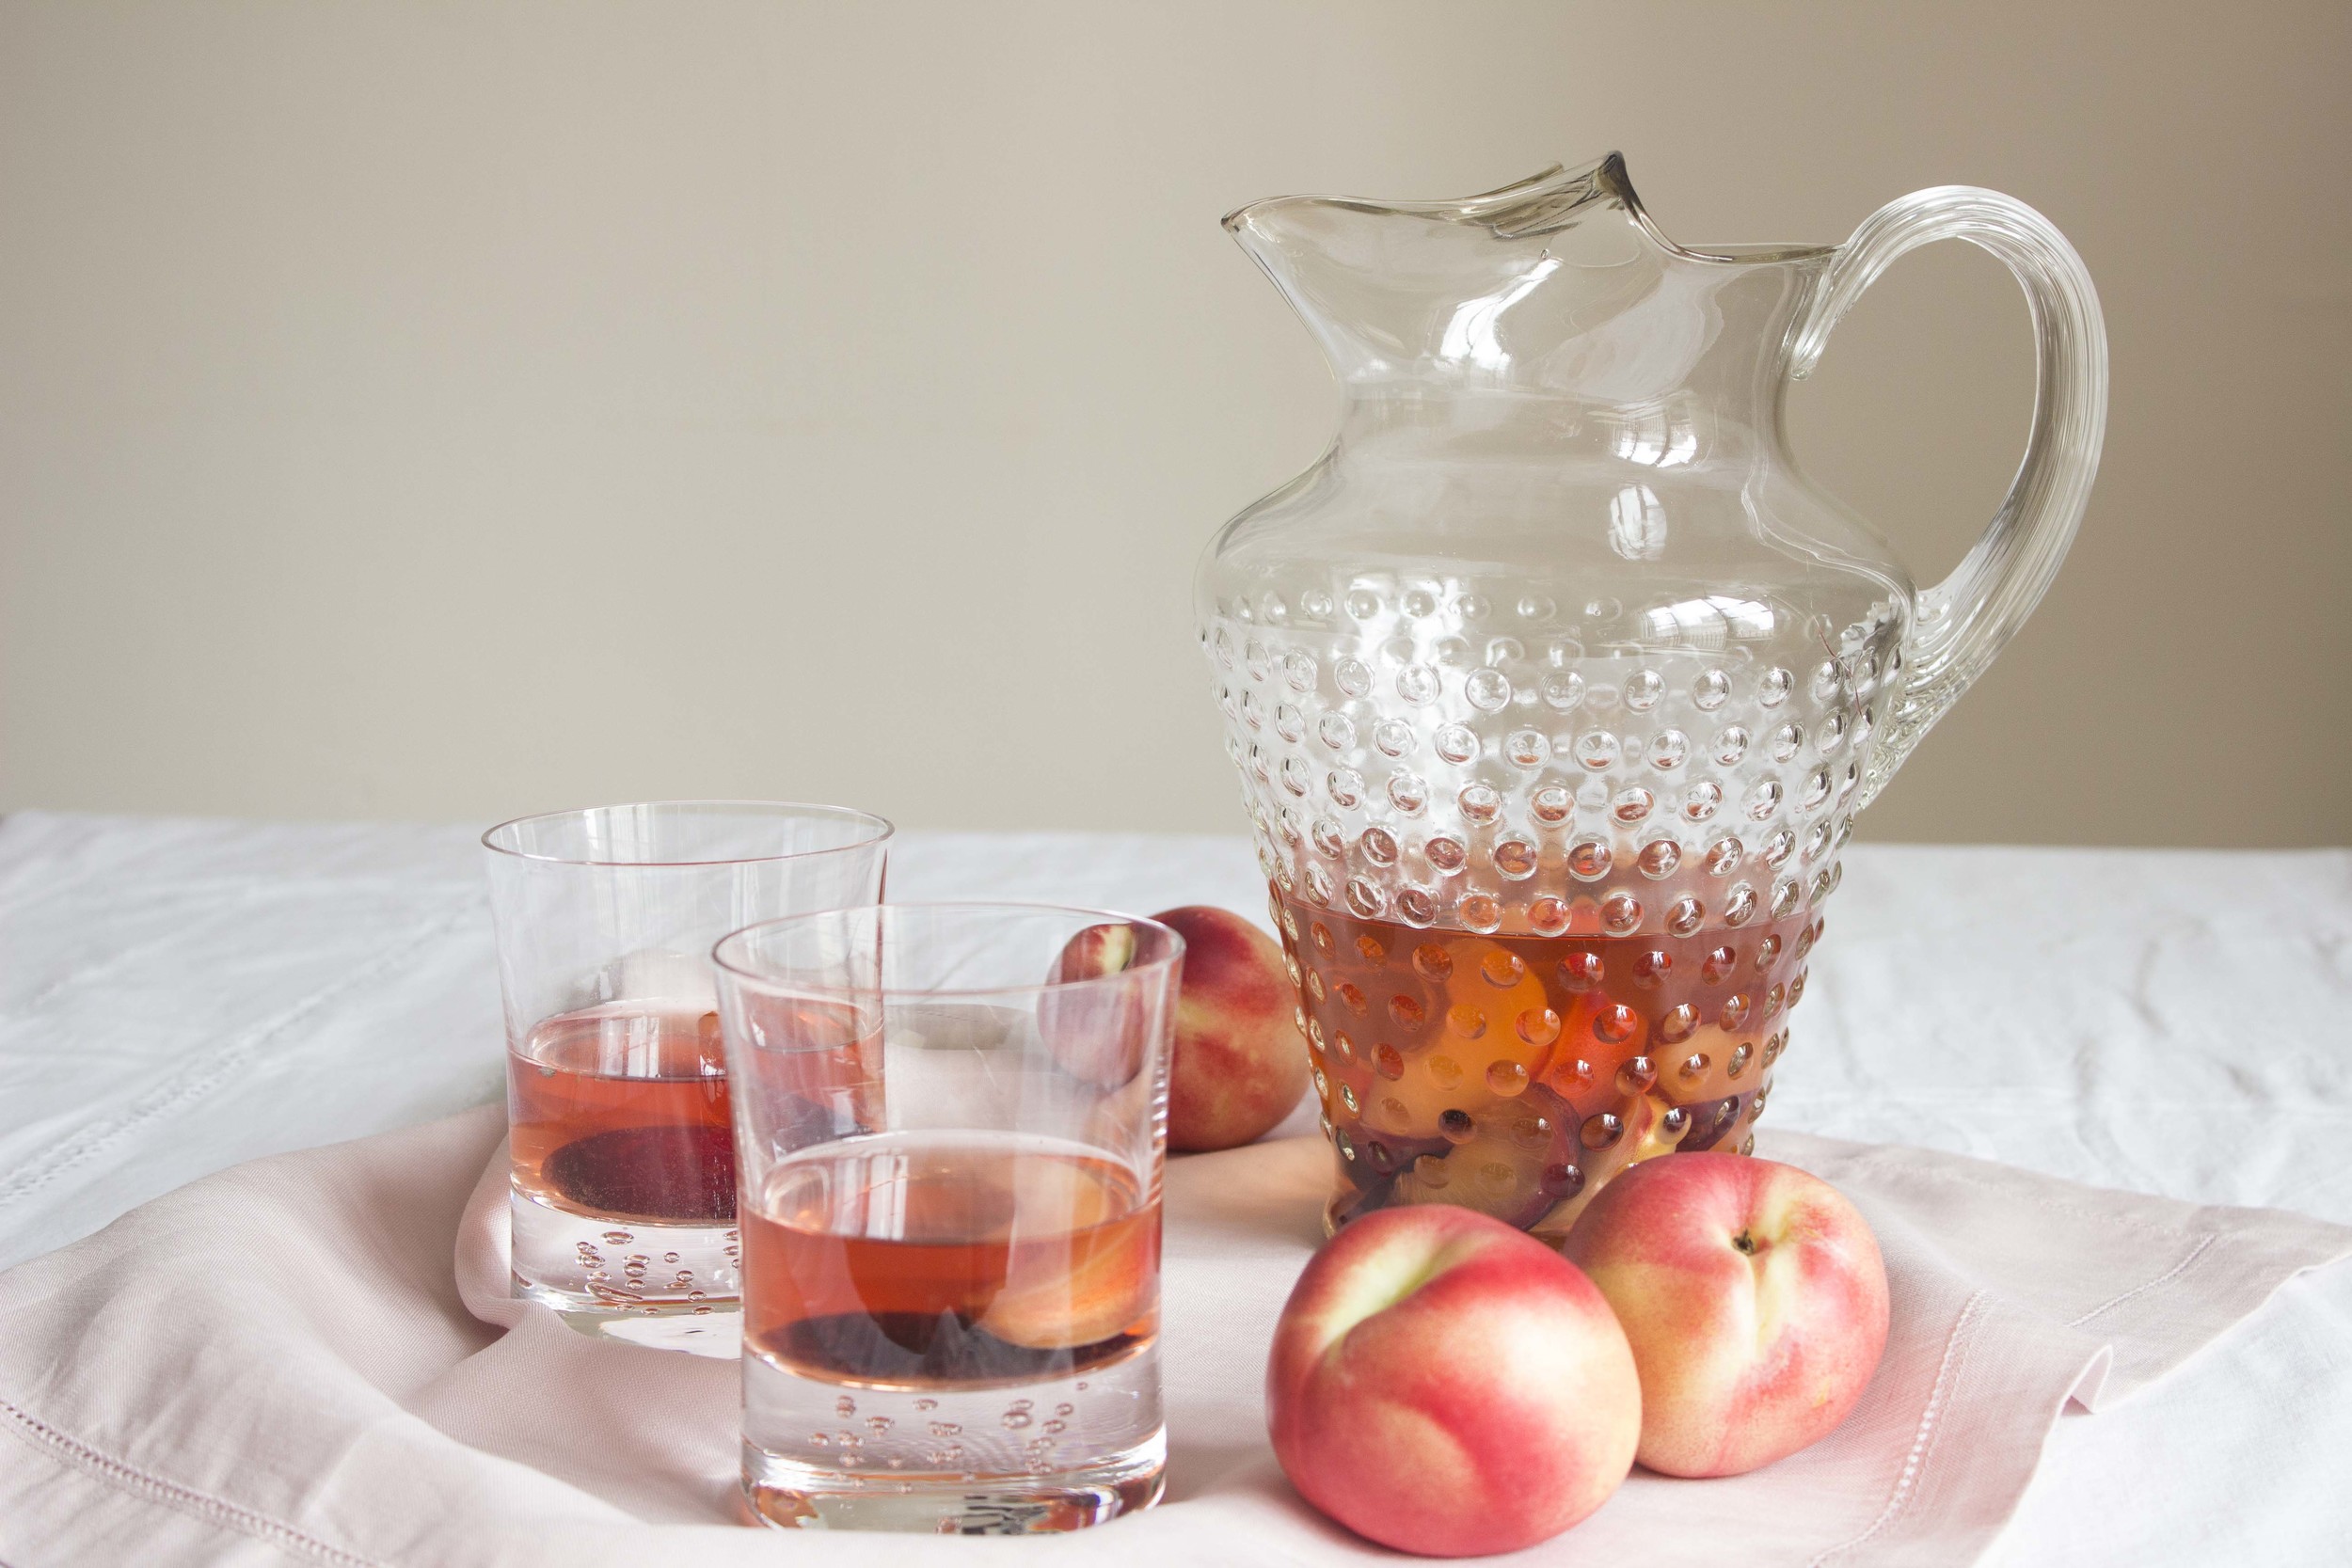
Lavender and Stone Fruit Rosé Sangria

Lavender and Stone Fruit Rosé Sangria

Summer entertaining should be simple, easy, and low stress. It’s just too hot to be mixing individual cocktails, so summer calls for a big batch of something delicious and refreshing that guests can help themselves and sip on as the sun drops lower in the sky. Rosé has become synonymous with summer afternoons and earlier in the season I had the pleasure of creating a recipe for a rosé tasting event at Maman, my favorite café in New York. Talk about a dream come true!

I was only recently introduced to Lillet Rosé by my lovely friends Josie & David, and afterward couldn’t believe I had gone so long without having it in my life. It makes a super simple aperitif – just add a sizable cube of ice and a slice of something citrusy.

Lavender and Stone Fruit Rosé Sangria

Or, take it one step further and transform it into a twist on sangria. Traditionally sangria combines wine with a liqueur or brandy, but since Lillet is already a fortified wine in my variation you get to skip that step. Score. Maman’s Provencal influence provided the inspiration to enhance the flavor by adding lavender and stone fruit. It fits the low-stress bill, and has the added benefit of being even better when it’s made in advance.

Lavender and Stone Fruit Rosé Sangria (serves 4)

Ingredients:
1 bottle (750 ml) Lillet Rosé
3/4 teaspoon (3-4 sprigs) dried culinary lavender buds
1 ripe black plum
1 ripe white nectarine
2 ripe apricots
1 medium lemon
1/4 cup (2 oz.) club soda
Ice
Garnish (optional): fresh raspberries, blackberries, strawberries

Instructions:
Pour the Lillet Rosé into a large pitcher or glass container. Lightly crush the dried lavender flowers between your hands to release the essential oils and place in a tea bell or a piece of cheese cloth tied with kitchen twine and suspend in the wine. Allow the lavender to infuse the wine while you prepare the fruit.

Wash and remove the stone from the plum, nectarine, and apricots. Slice into 1/3 inch wedges and drop into the pitcher. Thinly slice half the lemon (reserve the other half) into rounds or half moons and add to the sangria. Stir gently with a wooden spoon. Chill the sangria overnight, or at least 3-4 hours, to allow the fruit, lavender, and Lillet Rosé to steep.

Just before serving, use a sharp knife to remove large strips of peel from the reserved lemon and wipe the yellow skin of peel around the inside of each glass. Place the ice in the glasses, remove the lavender sachet from the sangria, and add the club soda to the pitcher.

Divide the sangria among the glasses making sure that the fruit goes in too – it’s delicious! Garnish with a sprig of lavender (if using) or additional berries as your heart desires. Relax and enjoy.

Original recipe created for Maman and sponsored by Lillet. All opinions are my own.

Small Kitchen Friendly?
Yes! I used a large pitcher, liquid measuring cup small cutting board, utility knife, wooden spoon, cheese cloth, and kitchen twine.
 

Lavender and Stone Fruit Rosé Sangria

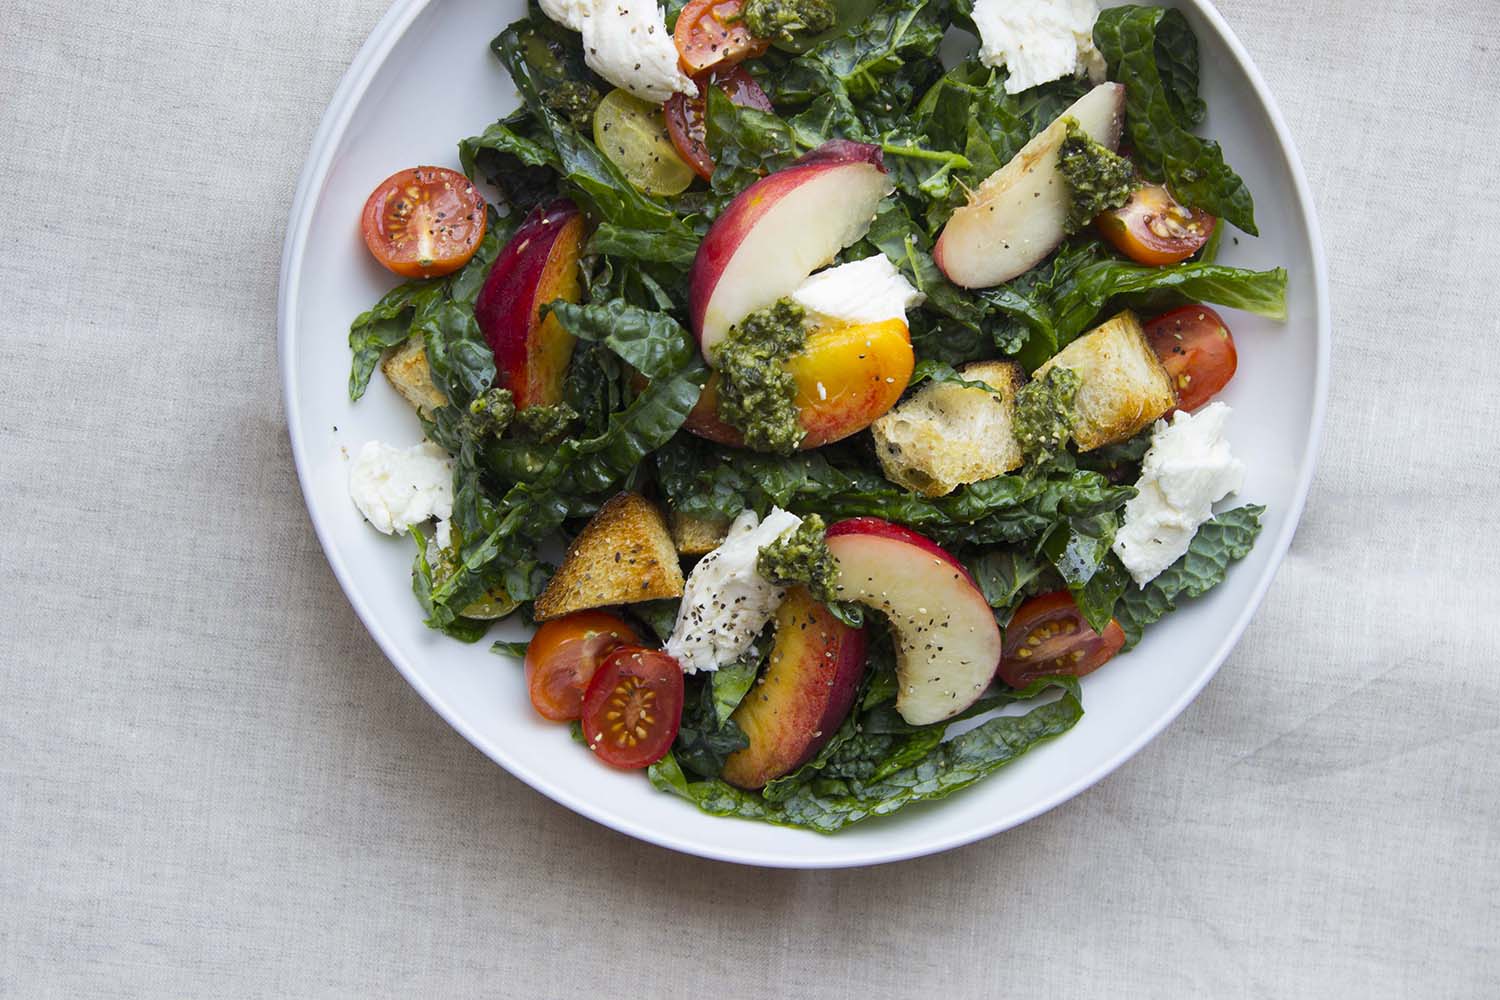
Summer Panzanella Salad with Pesto Vinaigrette

Summer Panzanella Salad with Pesto Vinaigrette | Image: Laura Messersmith
Summer Panzanella Salad with Pesto Vinaigrette | Image: Laura Messersmith

This recipe will seem out of place once I tell you that wet bread makes me cringe. An under-cooked piece of French toast, still sodden with eggy custard sends a cold chill up my spine. A cellophane-wrapped sandwich where the tomatoes have seeped into the previously delicious roll? Eww.

Summer Panzanella Salad with Pesto Vinaigrette | Image: Laura Messersmith

Summer Panzanella Salad with Pesto Vinaigrette | Image: Laura Messersmith

So, as you might guess, I have avoided panzanella salads like the plague for 99.9% of my life until essentially this moment when I made one myself and discovered that if the bread-to-greens ratio tips slightly in favor of greens, the dressing trends toward a thick sauce, and the croutons are definitively toasted to burnished bronze then I’m good to go.

Only a few terribly specific requirements, oh and if there could be stone fruit involved too? There is? Awesome. This, my friends, is that recipe. An excellent dish for dinner with friends – fresh, light, filling, and gorgeous.

Summer Panzanella Salad with Pesto Vinaigrette | Image: Laura Messersmith

Summer Panzanella Salad with Pesto Vinaigrette | Image: Laura Messersmith

Summer Panzanella Salad with Pesto Vinaigrette (serves 4)

Ingredients:
4 cups sourdough bread cubes
4 teaspoons (3 cloves) minced garlic
2 1/2 cups fresh basil leaves, lightly packed
2 lemons
4 cups (1 large bunch) lacinato kale leaves
2 cups cherry tomatoes
2 ripe nectarines
4 ounces fresh mozzarella
olive oil
kosher salt
ground black pepper

Instructions:
Pre-heat the oven to 400 degrees F.

Cut the sourdough into 1/2 inch squares (no need to remove the crusts) and place on a sheet pan lined with parchment paper. Toss with a drizzle of olive oil and a sprinkle of kosher salt. Toast in the oven, turning periodically for 8-10 minutes or until lightly browned and crunchy. Set aside to cool.

Meanwhile, place the garlic cloves and 2 cups of the basil leaves in the bowl of a small food processor. Pulse until a thick paste forms. Scrape the pesto into a bowl or jar and mix with 1/3 cup olive oil and 1/4 cup fresh lemon juice to form a thick dressing. Season to taste with kosher salt and pepper.

Wash the kale leaves, the working with 4-5 at a time, remove the center rib and stack the leaves. Roll lengthwise in a loose cigar shape and slice across the roll in 1/4-1/8” ribbons. Repeat until all the kale is shredded, then toss together with 2 tablespoons of the pesto dressing and the remaining 1/2 cup fresh basil leaves.

Prepare the remaining ingredients. Remove the pits and slice the nectarines in thick wedges, cut the tomatoes in halves or quarters and tear the mozzarella in rough pieces.

In a large, shallow bowl layer the dressed kale and basil leaves with the nectarines, tomatoes, bread cubes, and mozzarella. Dollop the remaining pesto dressing on top and serve!

Inspired by The First Mess’s Summer Panzanella with Peaches and Kale.

Small Kitchen Friendly?
I used a rimmed baking sheet, medium cutting board, bread knife. Small food processor, medium mixing bowl, chef’s knife and tongs.

Summer Panzanella Salad with Pesto Vinaigrette | Image: Laura Messersmith

Summer Panzanella Salad with Pesto Vinaigrette | Image: Laura Messersmith

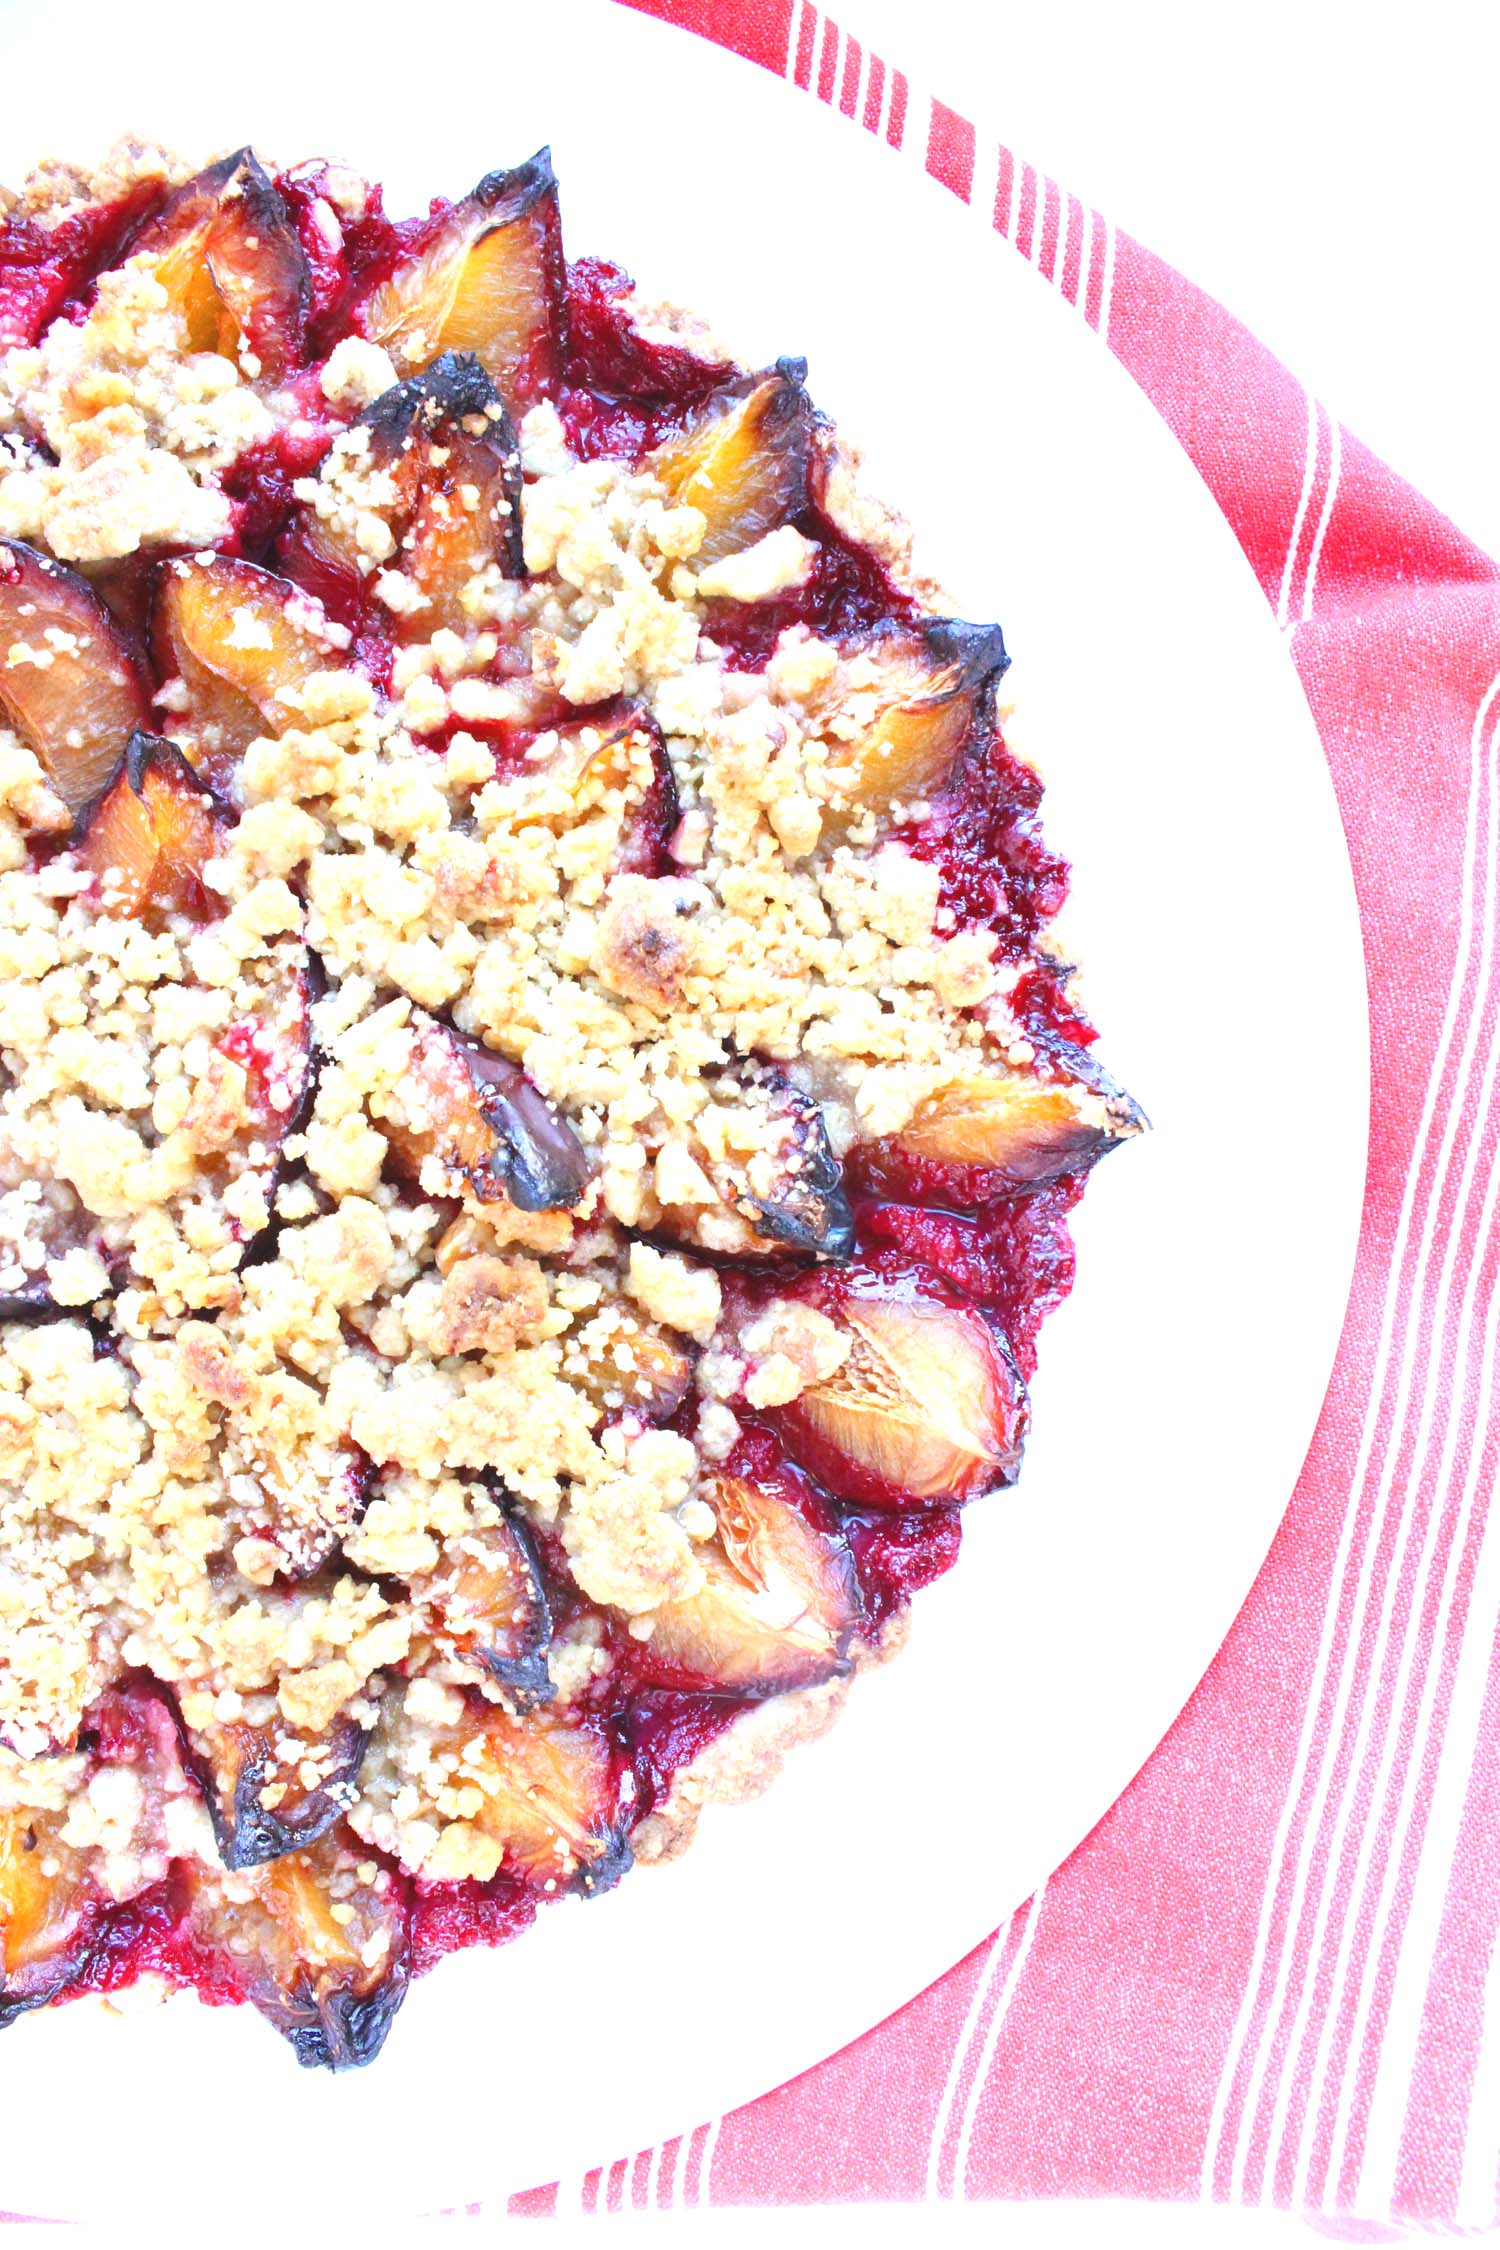
Plum Tart

Plum Tart | Image: Laura Messersmith

Plum Tart | Image: Laura Messersmith

Each week I follow along with Ina Garten (aka the Barefoot Contessa) and attempt to recreate one of her dishes in my tiny New York City kitchen. The catch? This is my version of cooking school and I’m making these recipes for the first time. I’ll share both my successes and um, challenges, along the way and we’ll see if I can keep up with the Contessa!

Episode: “Long Distance Dinner”

The Set-up: Ina’s cooking a dinner party menu that will be delivered to a friend’s daughter in the city.

The Menu: Filet of Beef Bourgignon, Zucchini Gratin, Plum Tart

0:34 – Ina says this dinner is for her friends’ daughter Genevieve as a post-med school exam treat. This is one legit motivator.

1:20 – First up is dessert, a Plum Tart with a walnut crust, which just has to be pressed into the pan. No rolling involved, you say…?

2:16 – The crust mixture is compared with a typical crumble topping – butter, sugar, finely chopped walnuts, etc. and Ina is setting some aside to put over the top of the plums.

3:42 – Pro Tip #1: Use a metal measuring cup to press the crust into place and create a sharp corner where the bottom and sides meet. Pro Tip #2: Flour the measuring cup if it sticks.

4:11 – Ina says she likes to use Italian Prune Plums when they’re in season, but today it’s just regular black plums in a lotus pattern. Basically, concentric circles of fruit wedges.

5:05 – I just realized that Ina didn’t peel the plums, 100 points in favor of fruit that doesn’t require peeling!

6:33 – Instructional Phone Call Alert! Genevieve requires guidance on flowers and wine to go with the dinner and Ina says – one color, one type of flower, and lots of them. For wine – another burgundy or similar to pair with the wine in the dish. Sounds simple enough…

9:07 – Now it’s time to work on the Zucchini Gratin which Ina particularly likes because it’s an easy way to make a vegetable dish in advance.

10:18 – So, I’ve been watching Ina on the regs for a while now and I still don’t know why nutmeg is a traditional gratin spice.

11:34 – Ina is not messing around with this gratin, cheese, breadcrumbs, and little dots of butter are in the topping. G’s party guests are going to need a post dinner walk!

12:26 – Speak of the devil: Genevieve is on the hunt for flowers, oh so casually dropping in that her “friend Ina” recommended… she walks out with $30 worth of hyacinths flown in from Holland.

13:41 – Main course time: Filet of Beef Bourgignon. I guess the fancy flowers aren’t going to be out of place since I think Ina has about $100+ worth of beef.

14:15 – Fun Fact: Ina started making this recipe when she was catering as a way to make a more rustic dish “really special.” Which is probably code for “my clients needed to impress their guests.”

18:30 – Okay, so the beef has been sliced into filets and seared, next bacon is crisped. Now for the garlic to get a quick sauté before deglazing the pan with the burgundy wine.

19:23 – Stop the presses! Ina says you don’t have to make your own beef stock, so you can free up that Saturday afternoon dedicated to the process.

20:38 – Pro Tip: Cut your vegetables on the diagonal to make a prettier shape.

21:52 – Over to Genevieve who appears to be picking up bottles of wine at random before giving up and asking the shop keeper for assistance. After hearing the menu he suggests an aligoté for white and pinot noir for red.

22:07 – Back to Ina who is thickening the sauce with a paste of flour mixed into softened butter which she recommends for thickening gravy too since it prevents lumps. Naturally, the French have a term for this it’s beurre manié.

23:59 – Stray thought… I usually try to sauté all the vegetables before adding wine, stock, etc. but Ina is doing the reverse and adding the carrots and onions to the stock. Hmmm…

25:41 – Final steps on the Filet of Beef Bourgignon adding everything back into the pan – seared filet, crisped bacon. A montage of Genevieve lighting candles and putting her flowers in water while Ina packs up all the food in a gigantic cooler.

26:28 – PS: she appears to be lending an oval Le Creuset for the party. Oh, to have extra French ovens for loaning!

27:46 – The cooler is handed over – rather easily which gives me hope that some strapping lad from the TV crew helped haul it and this one is an empty stand-in – for the trip to the city.

28:53 – Cut to Genevieve taking the reheated Zucchini Gratin out of the oven and the beef off the stove. Full accent on the French pronunciations as dinner is served. It look a-mazing.

29:49 – The New Yorker and former Bostonian in me is pleased to see that the apartment looks like a totally normal walk-up and that G’s serving “platter” for the Plum Tart is a plastic cutting board. Ahh, my twenties.

Final Thoughts:
I need to think more about ways to take classic dishes and make them special a la Ina.

A masterful lesson in “make-ahead” dinner - side, entree, and dessert.

This episode was filmed in 2006, loving the flip phone thank-you “selfie” G sends to Ina.

Plum Tart | Image: Laura Messersmith

Plum Tart | Image: Laura Messersmith

Lessons Learned:
I know I’ve just made a plum-related dessert, but we loved the Plum Cake Tatin so much that I had to try to fit in one more before Italian Prune Plums were out of season and try Plum Tart.

Fruit Selection – I personally liked the sharp tartness of the Italian prune plums, but if you want a more straightforward, sweet dessert then I’d use regular black plums, or pluots would work too especially if you’re finding other stone fruits hard to come by at this point in the fall.

Fruit Layout/Layering – This tart looks more dramatic when the points of the slices are emerging from the shell edges a bit which has the double benefit of giving you more space for a fourth ring of plums. I cut each plum into quarters (don’t forget your stone fruit lessons!) and started with the outer edge layering in toward the center. This is pretty forgiving and since the fruit cooks down a little I took the liberty of placing the slices in fairly snugly, and sneaking any extra slices I had at the end into spots that seemed like they could use a little more fruit.

Tart Shell – The shell is comprised of a similar concoction to your typical dutch apple pie crumb topping. The butter is cold to begin with, but warms and softens a little as you work the flour, sugar and walnuts into it. Mine seemed a bit dry at first and I worried that it wouldn’t hold together, but I kept mixing and pressing the ingredients with a rubber spatula until there was only a slight haze of flour visible, and it all turned out fine.

Shell/Crumble Ratio – The recipe suggests pressing 2/3 of the crumble into the tart pan and reserving the remaining 1/3 for crumbling on top. I’d revise that to 3/4 in the pan, 1/4 crumbled on top – there were a few places in the shell where I was having trouble getting good coverage and then it seemed like I couldn’t find enough places for all the topping to go.

Baking – I placed the tart pan on a rimmed baking sheet while it was in the oven, which turned out well since the fruit juices did bubble over a bit. The time was spot on, and once it had cooled the tart lifted easily out of its outer ring and off the base onto a cake plate.

Storage – The fruit has a lot of moisture in it, so if you have one of those old-fashioned pie safes, now is the time to bust it out. Barring that, if you can stand to leave it uncovered or just very lightly with parchment paper your crust will stay crisp and firm.

Plum Tart | Image: Laura Messersmith

Plum Tart | Image: Laura Messersmith

Small Kitchen Friendly?
Yes, completely. I used a 9” tart pan with removable base, a medium mixing bowl, small cutting board, chef’s knife, rubber spatula, measuring cups and spoons. A parchment lined baking sheet will be helpful in catching crumble & fruit juice.

The Verdict:
I actually wasn’t sure whether I would like the combination of walnuts and plums in the Plum Tart since I sometimes find walnuts a bit sharp, but in this case they add a lovely toasty mellowness and crunch to the crust. Despite the plums being essentially unseasoned – no tossing in sugar or spices – the tart still manages to be rich in a way that sneaks up on you. Just a small slice with a little scoop of vanilla ice cream is perfect. This is the perfect recipe for company, it looks so elegant but only you need to know how simple it is.

Plum Tart | Image: Laura Messersmith

Plum Tart | Image: Laura Messersmith