Parisian Roasted Chicken and Tiny Potatoes

Parisian Roast Chicken with Tiny Potatoes | Image: Laura Messersmith

Parisian Roast Chicken with Tiny Potatoes | Image: Laura Messersmith

I’ve had this page in the Smitten Kitchen cookbook flagged with a post-it note for about 2 years and I am absolutely kicking myself that I just made it this fall for the first time. It has everything to recommend it – simple, short ingredient list; minimal equipment, classic French flavors – and yet I think I was intimidated by the process of spatch-cocking a chicken.

What that means in a nut-shell is removing the backbone so that a whole chicken can be cooked flat; reducing the total cook time. A slightly gruesome project, but one that is over and done with in less than five minutes presuming you have a sharp knife, or set of kitchen shears at your disposal. I recommend using the paper towel to keep the bird from skidding around on the cutting board while you undertake this process. But then it’s over and the more typical seasoning and roasting commence.

I called this chicken “Parisian” because Deb Perelman, the recipe’s author, tells the story of eating a similar dish on a trip to France and it reminded me of an Ina Garten recipe inspired by her own experiences in the City of Light. One bite and it’s clear why this dish makes a lasting impression.

The results are beautifully golden crisp skin – no need for oil or butter to accomplish it, just a few more paper towels for patting dry – juicy meat, and potatoes** that have absorbed all those amazing chicken-y flavors. Since there’s only a small roasting pan to contend with there’s still space for a sheet tray of Brussels sprouts or asparagus in the oven and dinner hits the table in under an hour.

Parisian Roast Chicken with Tiny Potatoes | Image: Laura Messersmith

Parisian Roast Chicken with Tiny Potatoes | Image: Laura Messersmith

Parisian Roasted Chicken with Tiny Potatoes (serves 4)

Ingredients:
2-3 pounds ping-pong sized Yukon gold potatoes, peeled**
3 1/2 - 4 pound whole chicken
2-3 tablespoons kosher salt
1 tablespoon black pepper
2 tablespoons olive oil
2 tablespoons fresh thyme leaves
1 lemon

Instructions:
Pre-heat the oven to 450 degrees F.

Wash and peel the potatoes, then spread them in the bottom of a small roasting pan.

Place a layer of paper towel on a medium cutting board and prop the chicken up on its base with the back facing you. Use a chef’s knife to cut vertically along each side of the backbone to remove. (Or place the chicken breast side down and remove the backbone with sharp kitchen shears.) Discard the backbone or save for making chicken stock.

Turn the chicken breast side up and press along the breastbone to flatten. Pat the entire chicken dry - inside and out - with paper towels and sprinkle liberally with kosher salt and black pepper.

Drizzle the olive oil over the potatoes and toss together with kosher salt and pepper. Place the chicken on top of the potatoes, breast side up, using the vegetables as a makeshift roasting rack.

Roast the chicken in the hot oven for 45-50 minutes, tossing the potatoes and rotating the chicken halfway through. The chicken is done when an instant read thermometer reads 165 degrees F when inserted into the thigh. Allow the chicken to rest for 5-10 minutes.

Place the potatoes on a large serving platter. Then cut the chicken into pieces placing the legs, thighs, breasts and wings over the potatoes. Sprinkle the platter with the thyme leaves and a squeeze of lemon juice. Serve immediately with a simply cooked vegetable like roasted Brussels sprouts.

**Side Note: A note on the photos - I liked the rustic look of leaving the skins on and honestly peeling teeny potatoes is annoying, so I tested leaving the potato skins on and the results are good, but not amazing. Peeling or at least cutting the potatoes in half makes a BIG difference and allows the great chicken-y flavors to permeate, so it’s 100% worth it. If using a larger potato cutting them in small pieces achieves the same results.

Re-written from Deb Perelman’s Flat Roasted Chicken with Tiny Potatoes in The Smitten Kitchen Cookbook (pg. 173 – 174)

Small Kitchen Friendly?
Absolutely. I used a 9x13 metal roasting pan, a medium cutting board, chef’s knife, a vegetable peeler, and paper towels. That’s it!!

Parisian Roast Chicken with Tiny Potatoes | Image: Laura Messersmith

Parisian Roast Chicken with Tiny Potatoes | Image: Laura Messersmith

Parisian Roast Chicken with Tiny Potatoes | Image: Laura Messersmith

Parisian Roast Chicken with Tiny Potatoes | Image: Laura Messersmith

Lemony Artichoke Heart Stuffed Shells

Lemony Artichoke Heart Stuffed Shells | Image: Laura Messersmith

Lemony Artichoke Heart Stuffed Shells | Image: Laura Messersmith

Between magazines, Pinterest, Instagram, and cookbooks at any given time I feel like there are about 1,000 recipes I’m dying to make. I try to be organized, but somehow there’s a notepad on my phone for those moments when inspiration strikes on the go (or as I’m drifting off to sleep), a Word document roughly organized by month/season, and of course multiple Pinterest boards all collecting ideas.

If I’m lucky I cook the recipe straightaway, but others I’m saving for the right occasion when the dish and the eaters are just meant for each other. That was the case here. I’ve been meaning to make this recipe from the Smitten Kitchen cookbook for nearly six months, rather a long time to wait.

As much as I love baked pasta dishes it’s tough when there are only two people to eat it, so there I am: waiting to make this recipe until the stars aligned and we could lure some folks to the neighborhood for dinner. Thank goodness too, because this dish is everything I hoped it would be - like homemade mac and cheese taken to a grown-up place by the addition of lemon, white wine, and sautéed artichokes. If that's not reason enough, how about this: you can completely assemble the dish up to a day in advance and bake it when you're ready to eat. A make ahead dish that feels special enough for company? Yes, please!

Lemony Artichoke Heart Stuffed Shells | Image: Laura Messersmith

Lemony Artichoke Heart Stuffed Shells | Image: Laura Messersmith

Lemony Artichoke Heart Stuffed Shells (serves 4-6)

Shell Ingredients:
25-30 jumbo pasta shells (about a 12-ounce box, I used Barilla)
3 tablespoons unsalted butter
1 to 2 tablespoons olive oil, divided
1 large onion, chopped small
18 ounces frozen artichoke hearts, thawed and patted dry
1/4 cup dry white wine
1 cup (1 1/4 ounces) finely grated Romano cheese
1 cup (1 1/2 ounces) finely grated Parmigiano-Reggiano cheese
2 large egg yolks
1 tablespoon lemon zest
1 tablespoon freshly squeezed lemon juice
1 teaspoon salt
1/4 teaspoon ground black pepper

Sauce Ingredients:
4 tablespoons (1/4 cup) unsalted butter
1/4 cup all-purpose flour
2 cups whole milk
3 teaspoons (2-3 cloves) minced garlic
1/2 cup ricotta cheese
2 tablespoons freshly squeezed lemon juice
1 tablespoon lemon zest
1/2 teaspoon salt
Freshly ground black pepper to taste
2 tablespoons chopped flat-leaf parsley

Instructions:
Make the Filling:

Melt butter in a heavy 12-inch skillet and cook it until it turns nutty and brown, stirring occasionally to keep the solids moving on the bottom of the pan. Once it is a nice nutty brown, add 1 tablespoon olive oil, then the onions and cook them until they are lightly brown and caramelized, about 7 minutes. Add the artichoke hearts and cook them until they are softened a bit, about 5 minutes. Add the wine and cook it until it completely disappears.

Remove the pan from the heat and let it cool slightly, before transferring it to the bowl of a food processor. Add both cheeses, the egg yolks, lemon juice, salt and black pepper and pulse in the food processor until roughly chopped. You want a mixture with some texture, not a puree.

Note: If you don’t have a food processor, then make sure to cut your onions quite small and chop the artichokes on the fine side before cooking. Follow the instructions as written, then once the filling cools mix it in a large bowl.

Cook the Pasta:
Bring a large pot of salted water to a boil, and cook the shells just shy of al dente. Check the box to see if there are cook times for shells that will be baked - Barilla recommends 9 minutes, which was perfect. Drain and toss with a teaspoon or two of olive oil, to keep them from sticking.

Make the Sauce:
While the shells are cooking, melt the butter in a medium saucepan (or the wiped out pot you made the artichoke filling in, if you’re into spending less time scrubbing pots) over medium-high heat. Once melted, add the flour all at once and whisk it until smooth. Add the milk, a small glug at a time, whisking constantly so no lumps form. Once the mixture has reached a batter-like consistency, you can begin adding the milk in larger pours at a time, whisking the whole time. Once all the milk is added, add the garlic and bring the sauce to a boil, stirring frequently. Once boiling, it will immediately begin to thicken. Reduce the heat to medium and simmer for two to three minutes before stirring in the ricotta, lemon juice, salt and black pepper, and chopped parsley. Adjust salt, pepper and lemon to taste.

Assemble the Dish:
Preheat oven to 350 degrees. Layer about half the sauce in the bottom of a 9×13 baking dish. Press a generous tablespoon of artichoke filling inside each cooked shell – a cookie scoop will be useful – so that the shell is full, but the sides can still meet. I found that resting the pasta on a cutting board using one hand to hold the edges apart and the other to scoop worked best. Nest each pasta shell in the sauce, seam up. Spoon the remaining sauce over the shells. Cover the dish with foil and bake it for 30 minutes, then remove the foil and bake it for a final 15 minutes. Serve immediately.

Individual Servings – Divide about half the sauce among 6 oven safe baking dishes (I used 16 ounce ramekins), divide the stuffed shells (5-6 shells fit snugly) among each dish and top with the remaining sauce as above. Cover with foil and bake for 20 minutes at 350 degrees F, followed by 5 minutes uncovered.

Make Ahead – Assemble the dish (or dishes) and cover each in foil. Refrigerate up to 24 hours. Add 3-5 minutes to the original baking times.

Recipe re-written and slightly adapted from Deb Perelman’s Artichoke Stuffed Shells in the Smitten Kitchen Cookbook (pg. 125 ) link via Bon Appetit.

Lemony Artichoke Heart Stuffed Shells | Image: Laura Messersmith

Lemony Artichoke Heart Stuffed Shells | Image: Laura Messersmith

Small Kitchen Friendly?
Yes, with organization. I used one large sauce pan, one large, deep sauté pan, a medium food processor, 9x13” baking dish (or 6 individual - the dishes pictured are Corningware 16 ounce ramekins), a colander, and a medium cutting board.

For tools I used a chef’s knife, microplane zester, a liquid measuring cup, measuring spoons, 1 tablespoon cookie scoop, rubber spatula, whisk, and a ladle or large spoon.

The Verdict:
Considering how fantastic the flavors are I fervently hope your stars hurry up and get their ducks in a row, because no one (even the artichoke adverse) should have to wait long to eat this dish. I bumped up the lemon zest a bit and added the parsley to the sauce, rather than sprinkling it on top to give the dish a subtle fresh note and make sure it didn’t become too heavy. Seconds were had by all and some simply roasted Brussels sprouts made the perfect accompaniment. All in all, a successful mid-winter dinner!

Lemony Artichoke Heart Stuffed Shells | Image: Laura Messersmith

Lemony Artichoke Heart Stuffed Shells | Image: Laura Messersmith


Winter Woodland Gingerbread Cookies

Woodland Gingerbread Cookies | Image: Laura Messersmith

Woodland Gingerbread Cookies | Image: Laura Messersmith

When I was growing up my siblings and I would spend most of the afternoon on Christmas Eve rolling dough and making cutout cookies. My sister and I traded off who used the rolling pin to prepare a new patch of dough while my brother plotted his next move – would it be the evergreen tree, the star, maybe the random chicken shaped cutter (an old-fashioned tin one with a red painted handle) that we insisted on using despite it’s non existent connection to the holiday at hand? My mother mainly left us to our own devices, occasionally taking a pass through the room to check on our progress.

We continued that tradition every year up until a year or so ago when we began spending holidays with our respective in-laws, and now I’m continuing in my own way. Much to my father’s chagrin we were dedicated to plain sugar cookies when I was a kid, but I’ve since realized the error in judgment and have turned my attention to these spicy, gingery cookies chewy with molasses and dark brown sugar.

The cookies are wonderful plain - complex with plenty of cinnamon, ginger and cloves – but a light layer of icing makes them festive and transforms some of my brown bears and foxes into their arctic cousins. Plus, who can resist snowy vanilla frosting or a sparkle of coarse sugar at Christmas?

Woodland Gingerbread Cookies (yield*: 50-60 medium cookies)

Ingredients:
6 cups all purpose flour, plus more for work surface
1 teaspoon baking soda
1/2 teaspoon baking powder
4 teaspoons ground ginger
4 teaspoons ground cinnamon
1 1/2 teaspoons ground cloves
1 teaspoon ground cardamom
1/2 teaspoon ground nutmeg
1/2 teaspoon ground allspice
1 1/2 teaspoons kosher salt
1 cup (2 sticks) unsalted butter at room temperature
1 cup packed dark-brown sugar
2 large eggs at room temperature
1 cup unsulfured molasses
Vanilla Icing (recipe below)
Decorative sugar (I used Sugar in the Raw Organic Cane)

Instructions:
Whisk together flour, baking soda, baking powder, spices and salt in a large bowl and set aside.

In a separate large mixing bowl (or in the bowl of a stand mixer) beat butter and brown sugar together with an electric hand mixer until fluffy. Add in one egg at a time and then the molasses until well combined. (A light coating of non-stick spray inside the liquid measuring cup will make pouring the molasses much easier.)

Slowly add in the flour mixture, mixing on low until just combined. The dough should still have streaks of flour and look a little dusty. Finish mixing by hand making sure to scrape the bottom and sides of the bowl with a rubber spatula. The texture will be quite sticky and almost fluffy.

Divide dough into thirds pat each portion into a flat disk about 1 inch thick and wrap each in plastic. Refrigerate until cold and firm, about one hour or up to two days.

When ready to bake, pre-heat the oven to 350 degrees F and line two rimmed baking sheets with parchment paper.

Roll the dough out on a lightly floured surface to a 1/4-inch thick. Even after chilling, the dough will remain semi-soft and pliable, and the cookies will puff up and spread slightly when baked, so cutters with minimal fine detail are best.

Cut into shapes of your choice and place 2 inches apart on the prepared baking sheets. Gather the scraps and re-roll until all the dough is used.

Refrigerate the cut cookies again for about 15 minutes. Bake cookies until crisp but not dark, 12 to 14 minutes. Place the baking sheets on wire racks and cool.

Allow the cookie sheets to return to room temperature before placing the next batch of cut cookies.

When the cookies are cool, decorate with icing and sprinkles. Once the icing is set, store cookies between layers of parchment or waxed paper in an airtight container for up to a week.

*Yield Notes: 50 medium/large cookies (moose, reindeer, fawns, bears, foxes), 22 small cookies (hedgehogs, squirrels)

Rewritten and slightly adapted from Smitten Kitchen’s Spicy Gingerbread Cookies a version of Martha Stewart’s Gingerbread Snowflakes

Woodland Gingerbread Cookies | Image: Laura Messersmith

Woodland Gingerbread Cookies | Image: Laura Messersmith
Vanilla Icing (yield: about 2 1/2 cups icing)

Ingredients:
6 cups confectioner’s sugar
2 teaspoons vanilla extract
3 teaspoons light corn syrup
1/2 teaspoon table salt
1/2 cup, plus 1 tablespoon skim milk
Food coloring (optional)

Instructions:
In a large mixing bowl, sift the confectioner’s sugar through a fine mesh sieve to remove any lumps. Next add the vanilla extract, corn syrup, salt, and food coloring, if using.

Pour in 1/4 cup of the skim milk and mix on low speed with an electric hand mixer. Consistency will be very thick. Add remaining milk 1-2 teaspoons at a time until the icing reaches your desired consistency. Thicker if you plan to spread with a knife or spatula, a bit thinner if you plan to pipe.

When the cookies are cool, ice with a piping bag or small offset spatula. Sprinkle with decorative sugars.

Adapted from Bon Appetit’s icing as described in New England Molasses Gingerbread Cookies.

Woodland Gingerbread Cookies | Image: Laura Messersmith

Woodland Gingerbread Cookies | Image: Laura Messersmith

Decoration Ideas
I did a combination of all over sugar, piping, full icing, and full icing + sugar for the truly hummingbird inclined. This had the dual effect of giving me the appearance of both arctic animals and creatures from more temperate climates. The icing recipe described above was enough to do about half with full icing, if you want every cookie to be fully covered I'd double it.

If you’d like to achieve the un-iced, all-over sugar effect place an even layer of white granulated sugar or sanding sugar in a plate. Lightly press the top of the un-baked cookie into the sugar and then chill and bake as usual.

Some hints on piping the outline, which I learned from watching cookie artist Patti Page on an episode of Barefoot Contessa. (some of her work) Rather than touching the tip of the piping bag to the cookie, instead hover the piping bag just above the surface letting the strand of icing fall onto the cookie and moving the piping bag along slowly (maintaining even pressure), so that the strand of icing drags behind just slightly. To adjust your position, turn a corner, or catch the details, tap the point down. Think connect the dots except you’re creating both the dot and the line between with the icing. You can watch her demonstrate here.

This is also useful if you’re looking for sharp icing edges. Pipe the outline first let it set a bit, then fill in the middle with an offset spatula or more piped icing. More coloring book than connect the dots.

Edited to Add: If you're looking for the specific cookie cutters I used the Drommar set from Ikea (via Amazon) and these two additional fawn and reindeer cutters by R&M (also via Amazon.)

Woodland Gingerbread Cookies | Image: Laura Messersmith

Woodland Gingerbread Cookies | Image: Laura Messersmith

Small Kitchen Friendly?
Potentially, with strict organization. The tricky part is during the baking/cooling stage. Do this in batches over the course of a day if you have to. For equipment I used two large mixing bowls, an electric hand mixer, rubber spatula, mixing spoon, liquid and dry measuring cups to mix the dough. You’ll also cookie cutters (or use biscuit cutters, the rim of a glass, any shape that appeals) need two rimmed baking sheets, wire cooling racks (or an elevated trivet), parchment paper, and plastic wrap.

For the icing I washed and reuse one of the large bowls, the electric hand mixer, measuring cups. Add in a sieve and an offset spatula, or piping bag set. Toothpicks will help with fine detail work.

The Verdict:
This is everything I could hope for in a gingerbread cookie and has more than earned its place in my Christmas cookie line-up. Spiciness that holds it's own against even the heaviest layer of icing, texture that miraculously balances the tricky tipping point between chewy and crisp. They filled the apartment with Christmas-y warmth only holiday baking and crazy whimsical cookie cutouts can. Yes, I probably spent more time than is healthy decorating, but that's half the fun, right? Definitely make these and watch them fly off the platter, that is if anyone can stand to eat something so adorable.

Woodland Gingerbread Cookies | Image: Laura Messersmith

Woodland Gingerbread Cookies | Image: Laura Messersmith

Fresh Cranberry Pie with Pecan Crumble

Fresh Cranberry Pie with Pecan Crumble | Image: Laura Messersmith

Fresh Cranberry Pie with Pecan Crumble | Image: Laura Messersmith

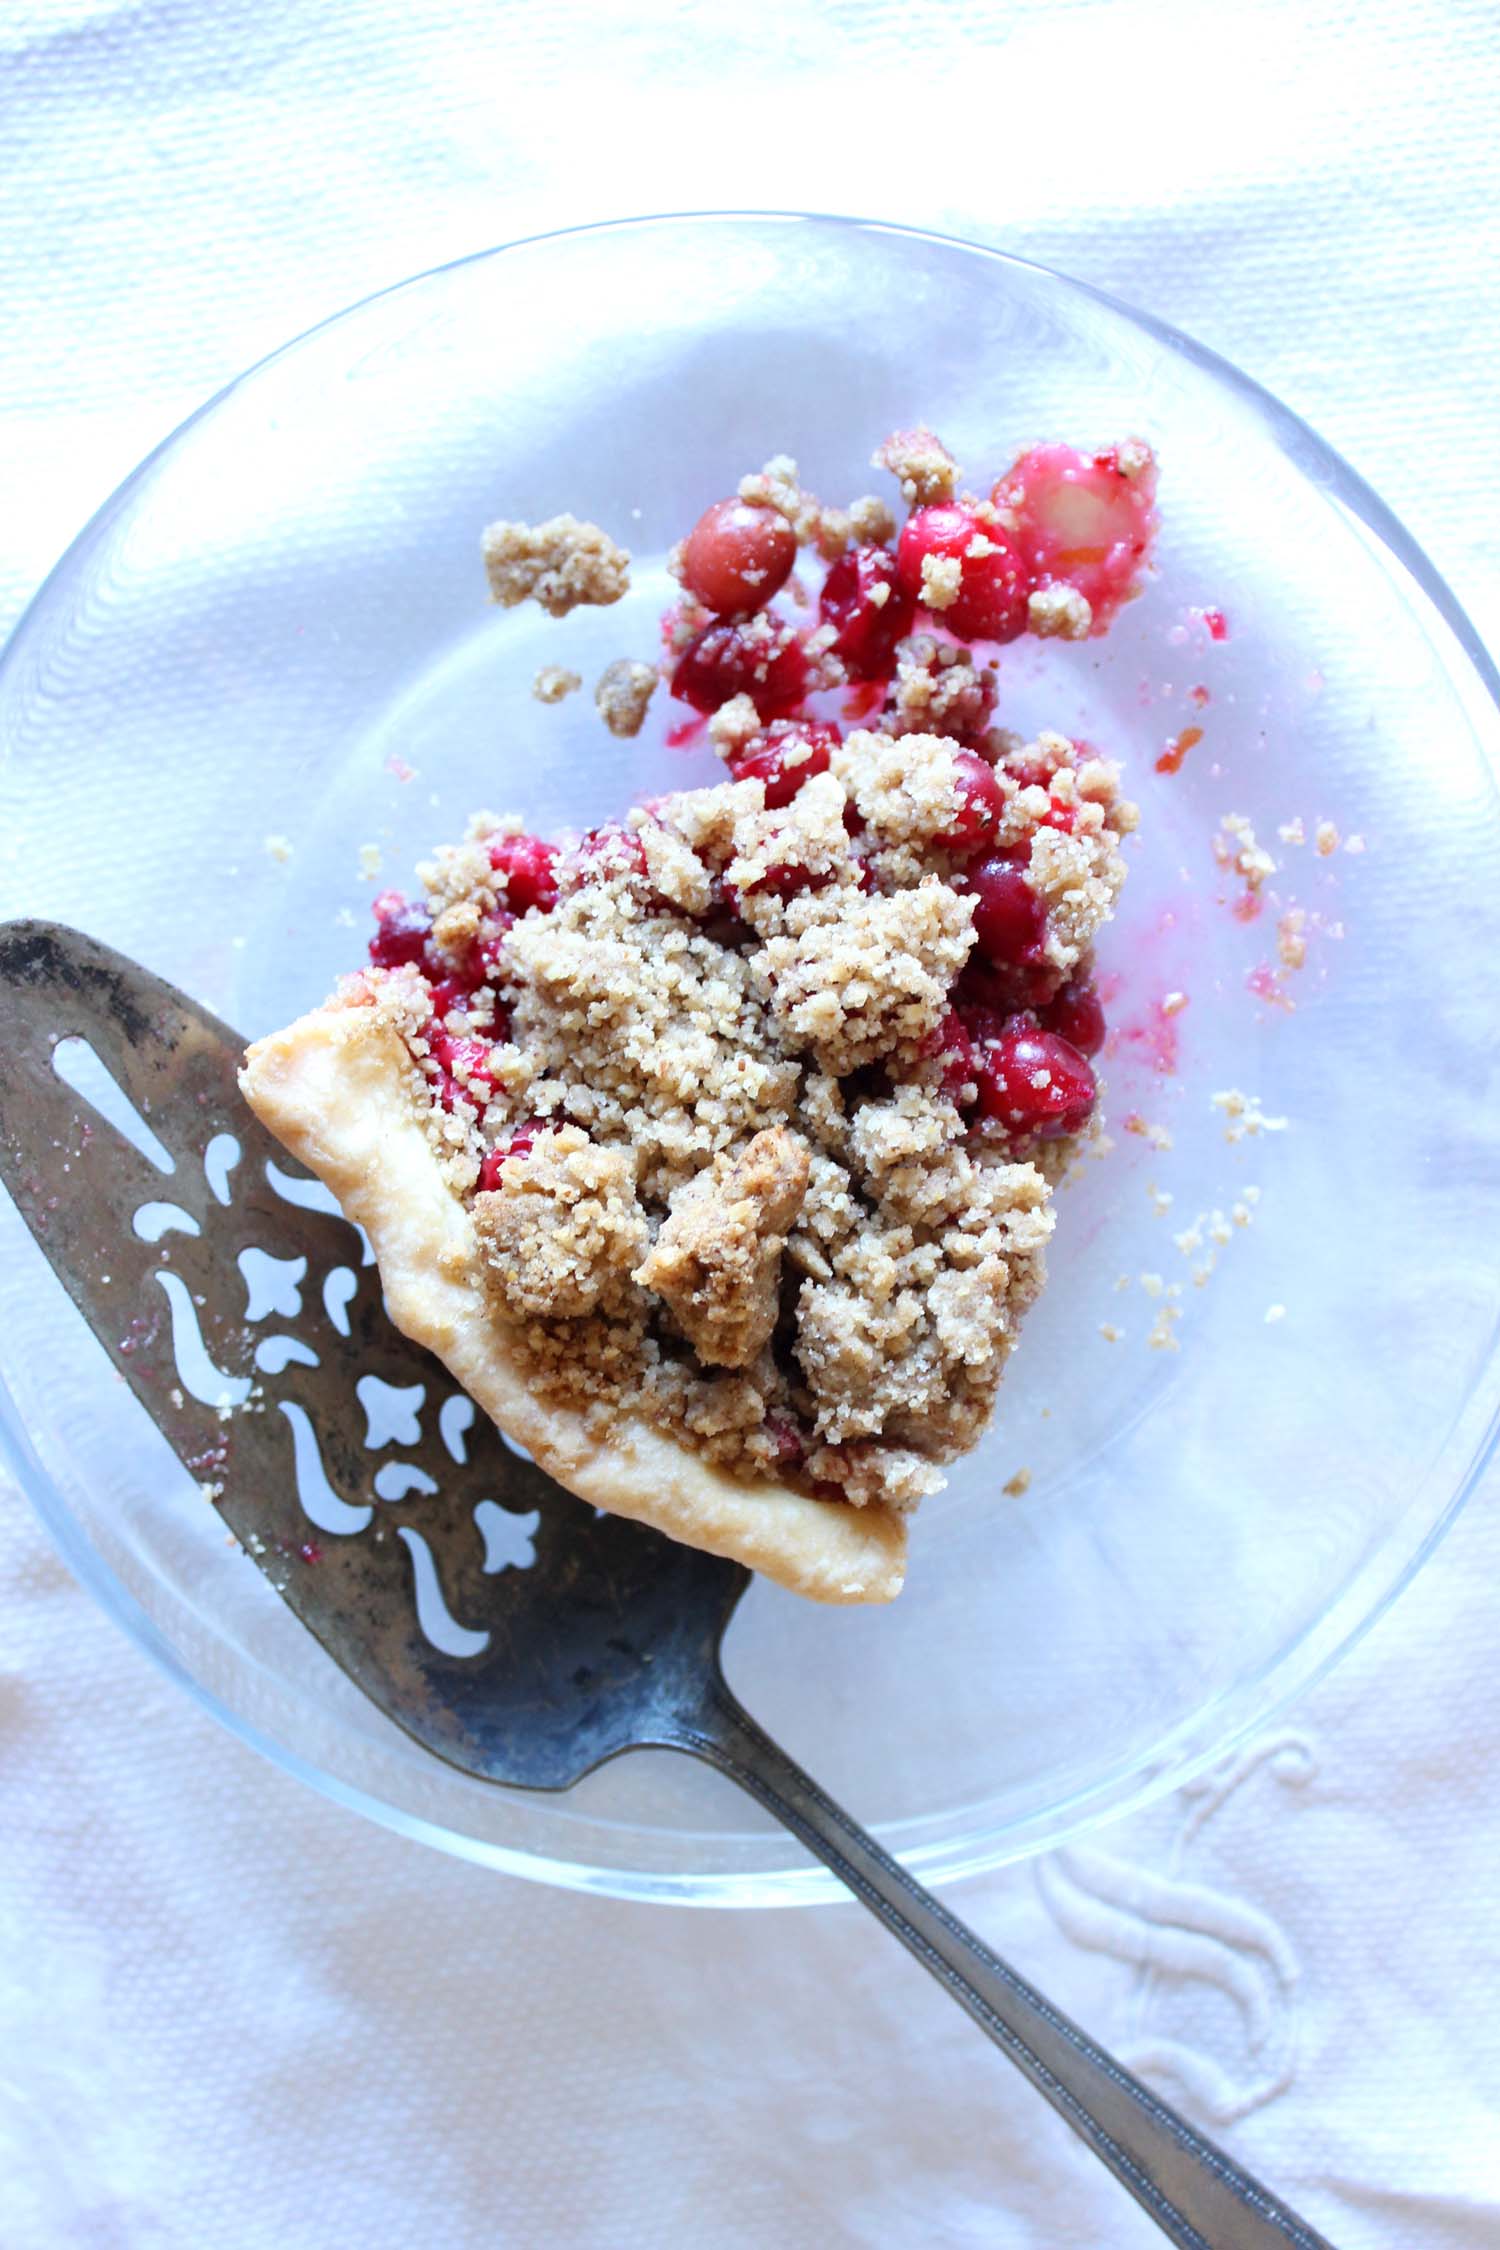
Cranberry pie. Is there a more perfect distillation of the Thanksgiving spirit than an entire pie packed with bright, tangy fruits who wait all year for this one Thursday in late November? It’s their time to shine - like the cranberry’s 21st birthday, New Year’s Eve, and Christmas all wrapped up in one extravaganza of eating. That’s what we have here, my friends. A pie that is aaaaalll about the cranberry, no shame in that game.

But first, let’s talk about perfection in an imperfect world. Wait a minute!? You thought this was a post about pie! Well it is in a way, because I almost didn’t post this pie. I had #piecrustissues, even after nearly 11 months of practicing, and I was dissapointed and more than a little frustrated not to be presenting a glorious specimen of pie craft worthy of a Martha Stewart dessert table. Unfortunately, somewhere during the blind-baking stage the edges puffed out and inflated all the carefully crimped and pressed edges beyond recognition. I blame an under-weighted pie and perhaps a slightly too cool oven. Either way, it’s pretty annoying to discover that several hours of preparation have yielded an underwhelming result.

Fresh Cranberry Pie with Pecan Crumble | Image: Laura Messersmith

Fresh Cranberry Pie with Pecan Crumble | Image: Laura Messersmith

I filled it with the ruby red cranberries anyway, dutifully pulsed the brown sugar-butter mixture into streusel and figured I’d just try again another time and skip a post for the week. Then as I thought about it, I realized that homemade pie, regardless of how wonky, is still something to be thankful for and appreciated! Even if it didn’t turn out as planned; my cranberry pie is still fruit and sugar and buttery crust – it’s what’s on the inside that counts and the effort it took to try in the first place.

So, here we are friends – thankful that there is pie in the world, but most importantly that there are family and friends to share it with. I hope that’s the case whereever you are too. Happy Thanksgiving!

For the similarly pie-challenged, may I offer this piece: "I Made Pie with Saveur's Food Editor and Here's What I Learned" by Marian Bull? If nothing else it’s very Zen and may help you and your dough relax.

Fresh Cranberry Pie with Pecan Crumble | Image: Laura Messersmith

Fresh Cranberry Pie with Pecan Crumble | Image: Laura Messersmith

Fresh Cranberry Pie with Pecan Crumble (yield: one 9-inch, standard pie)

Crust Ingredients:
1 1/4 cups (155 grams) all purpose flour
1 1/2 teaspoons (6 grams) granulated sugar
1/2 teaspoon (3 grams) fine sea or table salt
1 stick (4 ounces or 115 grams) cold unsalted butter, cut into chunks
1/4 cup (60 ml) very cold water, plus an additional tablespoon if needed
1 egg (for egg wash)

Filling Ingredients:
5 cups (24 ounces) fresh or frozen cranberries
1 cup granulated sugar, plus 1 to 2 more tablespoons, if desired, to taste
3 teaspoons orange zest
2-3 tablespoons fresh orange juice
Pinch of salt
1 tablespoon cornstarch

Crumble Ingredients:
2/3 cup rolled oats or 1/2 cup oat flour
1/2 cup all purpose flour
1/3 cup granulated sugar
1/3 cup light or dark brown sugar
1/2 teaspoon ground cinnamon
1/4 teaspoon coarse or sea salt
3/4 cup pecans, preferably toasted
6 tablespoons unsalted butter, melted and cooled

Serving Ingredients:
Powdered sugar, whipped cream, or vanilla ice cream

Crust Instructions:
In a large bowl, whisk together the flour and salt to combine.

Add the diced butter, tossing the cubes in the flour to coat. Cut the butter into the flour until it is the size of walnut halves (for a flaky crust) or peas (for a mealy crust).

Make a well in the center, and add the water a few tablespoons at a time and mix with a rubber spatula just until the dough comes together.

Form the dough into a flat disk, wrap in plastic and chill well before rolling, forming, and baking.

When the dough is chilled and rested, roll out to about 10” round. Carefully ease the pie crust into a 9-inch standard (not deep dish) pie plate, making sure not to stretch the dough at all, or it will shrink as the pie bakes. Trim edge to fit and prick the bottom of the crust with a fork, then place a piece of parchment paper over the pie crust. Cover the parchment with pie weight, dried beans, or uncooked rice making sure the weights extend up the sides.

Bake at 425 degrees F for 10-12 minutes until just lightly golden brown. Check the bottom through the glass.

Remove the pie weights and parchment and allow to cool while you prepare the filling.

Reduce the oven to 400 degrees F.

Filling Instructions:
Place all of the ingredients in a medium sauce pan over medium heat. Cook for 5-7 minutes until some of the cranberries have begun to break down and release some of their juices. Continue to cook for 5 more minutes, stirring occassionally until the filling is loose and just pourable. Set aside off the heat and allow the filling to cool for 5 to 10 minutes while you make the crumble topping.

Crumble Instructions:
Place the whole oats in the bowl of a large food processor and grind them to a powder.

Next, add the toasted pecans and pulse until the mixture is a coarse meal. Add the remaining ingredients except the butter, pulsing a few times to loosely combine.

Pour the melted butter through the feed tube, pulsing until crumbles form.

Assemble, Bake, Serve:
Brush the par-baked pie crust with egg wash, then fill with the cranberry mixture. Sprinkle the streusel topping over cranberry filling in large crumbles.

Bake the pie for 45 to 50 minutes at 400 degrees F, until the berry juices are bubbling enough that they seep into the crumb topping.

If pie begins to brown too quickly, cover top with a piece of foil for remaining baking time. Transfer to a wire rack to cool.

Serve warm or at room temperature with a sprinkling of powdered sugar, whipped cream, or vanilla ice cream.

Rewritten and slightly adapted from Deb Perelman’s Cranberry Pie with Thick Pecan Crumble via Smitten Kitchen.

Fresh Cranberry Pie with Pecan Crumble | Image: Laura Messersmith

Fresh Cranberry Pie with Pecan Crumble | Image: Laura Messersmith

Small Kitchen Friendly?
Yes, assuming you have a food processor or the patience to mince pecans. For the crust I used a large mixing bowl, pastry cutter, rubber spatula, a kitchen scale, liquid measuring cup, rolling pin, and chef’s knife. For the filling I used a medium sauce pan, microplane zester, rubber spatula, and measuring cups. To make the streusel I needed a large food processor and measuring cups.

The Verdict:
TBD pending Thanksgiving dinner. I’ll report back!

Fresh Cranberry Pie with Pecan Crumble | Image: Laura Messersmith

Fresh Cranberry Pie with Pecan Crumble | Image: Laura Messersmith